So if you read the first part of the Dead to Shread Series #2, you know that we did a pretty good analysis of the motor and replaced some external common culprits along the way. We changed out the cam chain, we replaced the harmonic balancer with a known good harmonic balancer, we inspected all of the cylinders, tested compression, and even dumped the oil and sifted through it and the oil filter for any of the forbidden glitter associated with an engine failure. Nothing was found... but the car still had a noise.
Now as we recommended in the last article... if you're in the same boat, don't stress. You've eliminated the problem as being on the motor side, it's likely something silly on the other side of the crankshaft such as the flywheel, clutch, throwout bearing... etc etc. While those are bad, if it's driving fine and it's just a noise... you can keep going and likely let it just drown into the background. HOWEVER... if you're still nervous... we're going to dig all the rest of the way into the motor for you to show that there's nothing else to sweat in there.
No Kill Like Overkill
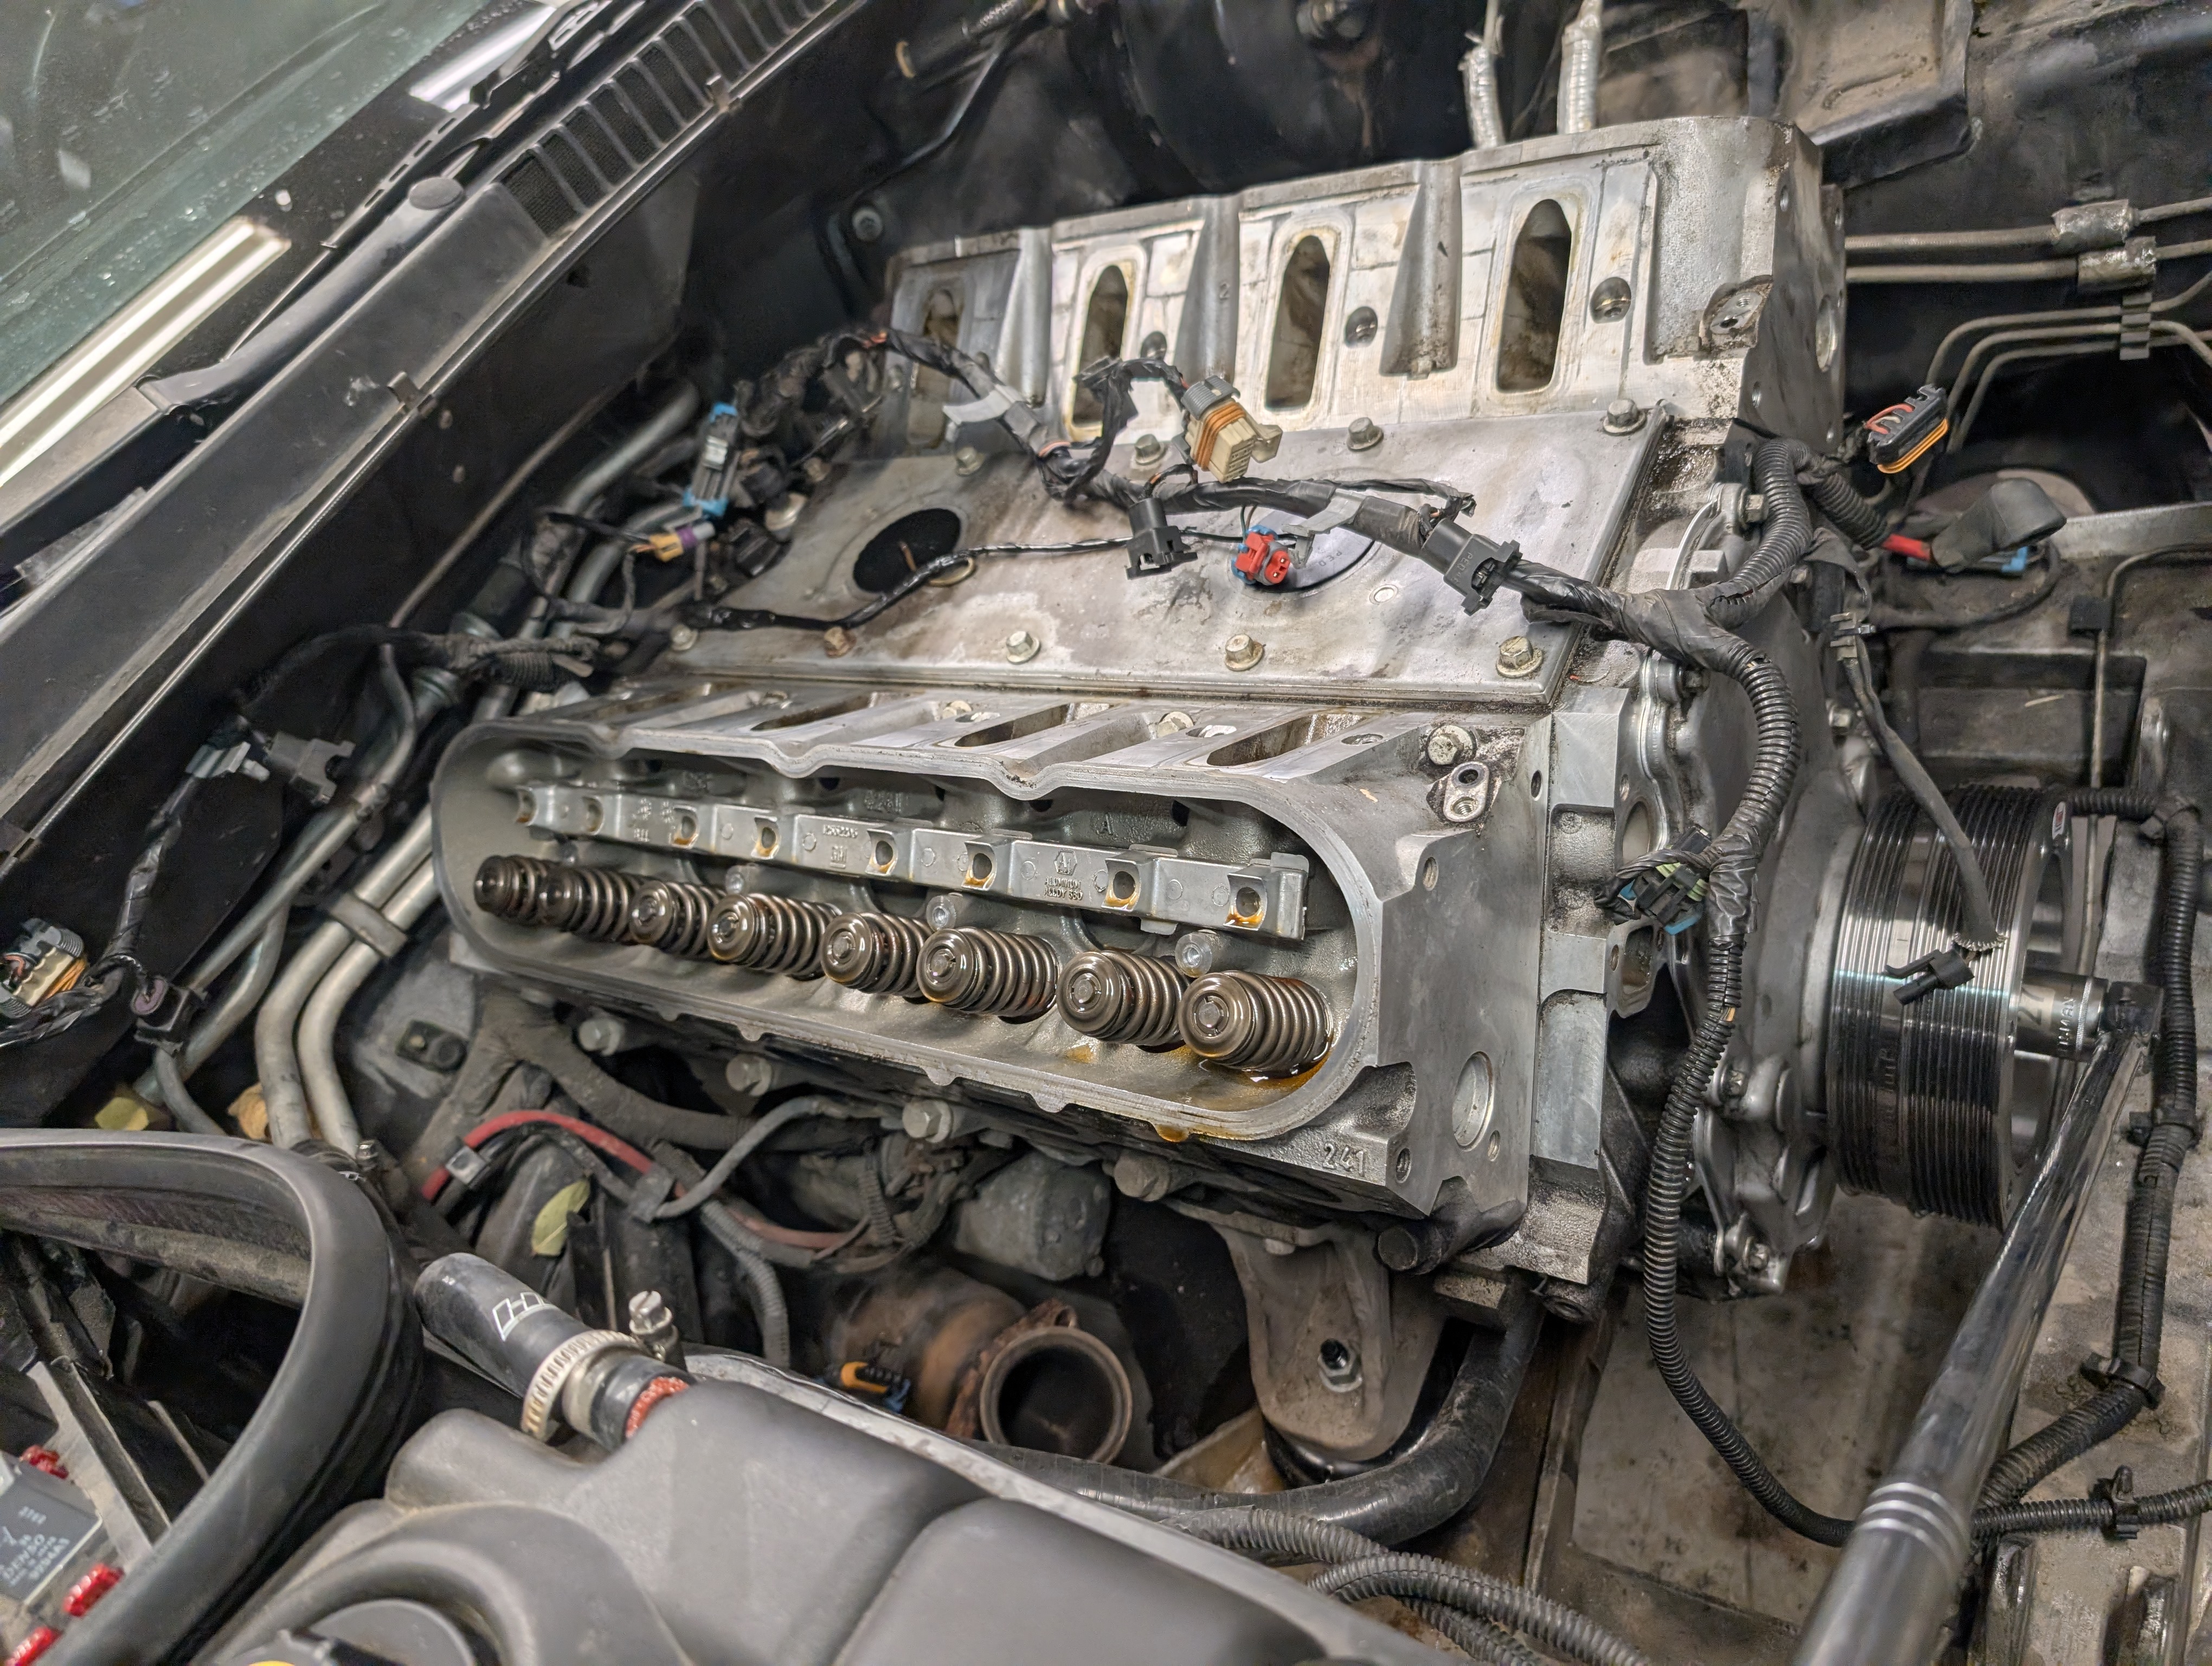
The first step into taking a motor past "reasonably sure" to "totally confident" is to pull the heads and deal with everything along the way. While a bore scope will let you see the bore condition decently, it's literally not the full picture due to access challenges... so you might as well pull the heads to be certain!
We'd also like to report from some facebook polling we did that if you try and get opinions on what the issues are you're going to get a ton of suggestions surrounding lifters... and while generally that's not going to be your issue and surely wasn't ours, you may find yourself heeding what people say and proceeding further into the motor as we have!
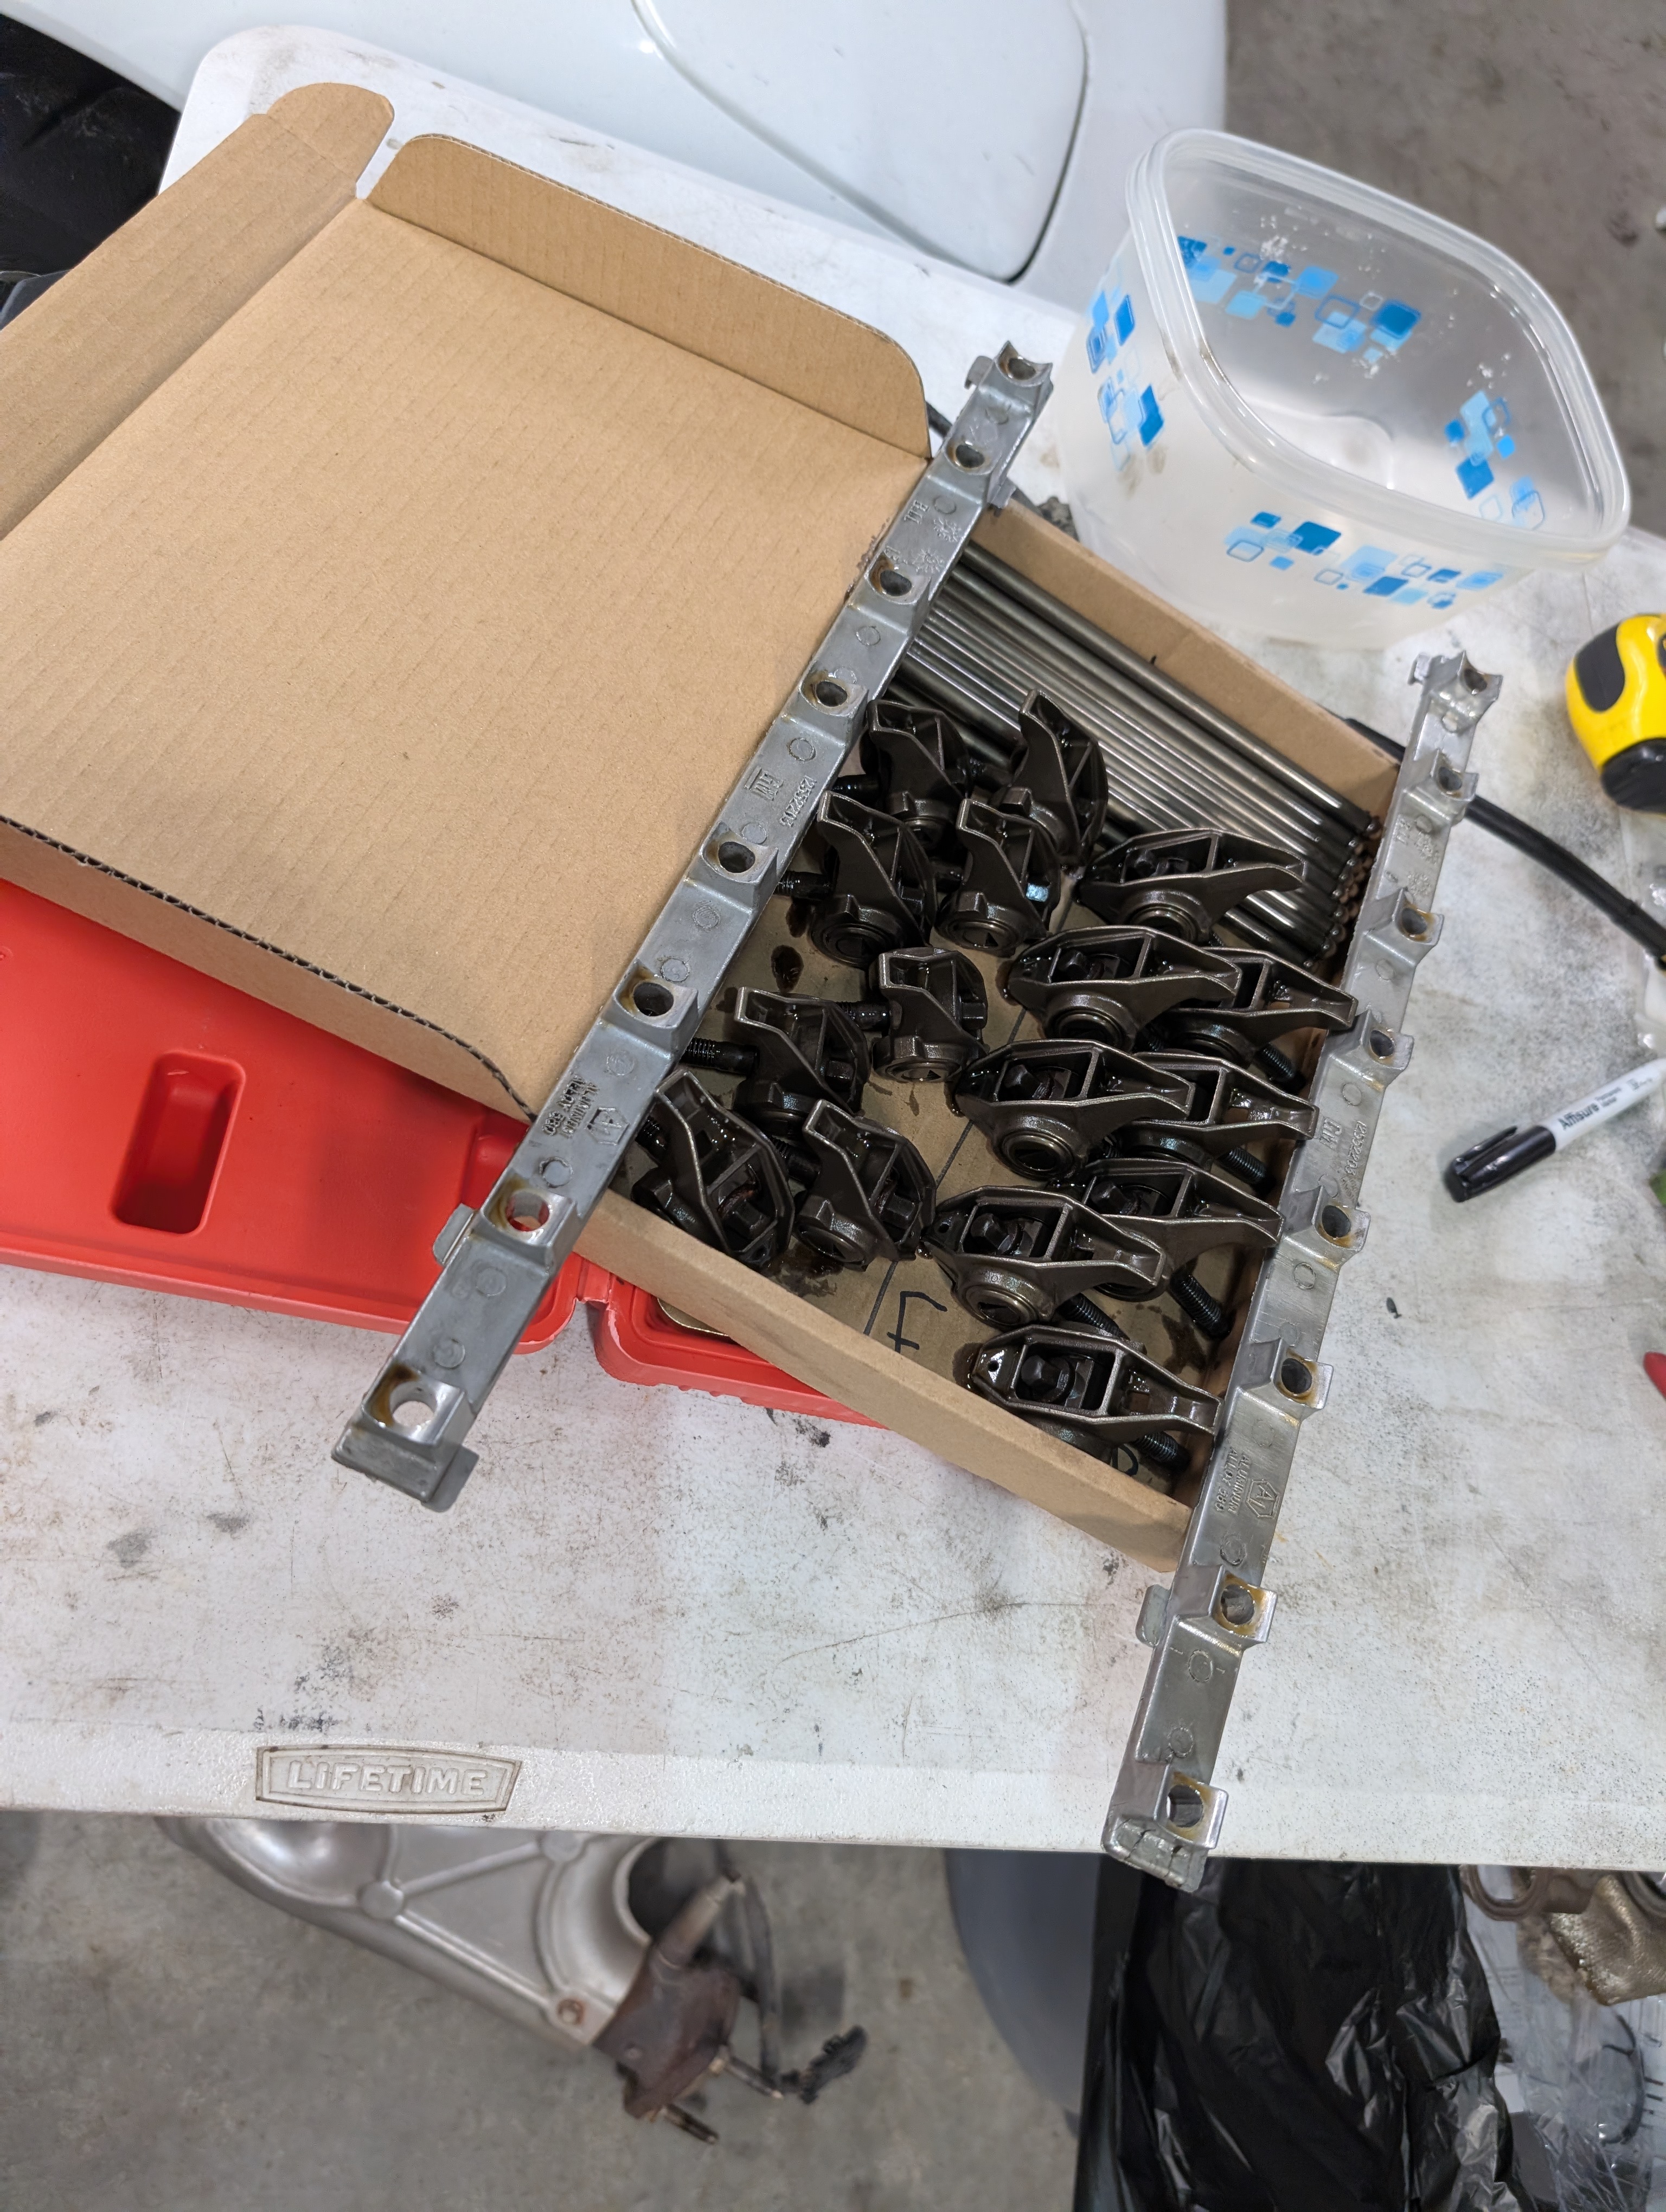
So at this point in the process we're going to assume you're comfortable with removing the intake manifold and everything else along the way to get to the heads. You'll next want to pull your valve covers and begin with removing your roller rockers. There isn't anything too exciting here, and the process is pretty easy. With your spark plugs removed the engine will turn over by hand easily, allowing you to crank the motor over until you can determine that the valves for a given cylinder are not open. It sounds overly simplified but if you put your fingers ontop of the rockers and turn the motor over it'll be very very intuitive that the valves are indeed closed. Once you determine a given cylinder has both of it's valve closed, simply unbolt the roller rockers and put them aside along with pull the relevant push rods.
Now it's not impossible that a roller rocker related issue could cause a whirr or noise of some kind... but it's pretty uncommon. Our roller rockers were fine and without issue, as were our push rods. Roller rocker failures on stock redline motors are pretty much unheard of, and while there are some articles out there about the OEM needle bearings failing and sending needle bearings all throughout your motor... we haven't heard of this happening on a motor in a very very long time. If your motor has a stock redline, you're probably okay.
Next up, you'll want to unbolt the head. Now fair warning, there will be some surprise coolant hiding in your motor that will dump out as part of this process. It's okay ,it happens. Just pull it all apart and have the kiddy pool ready under your car.
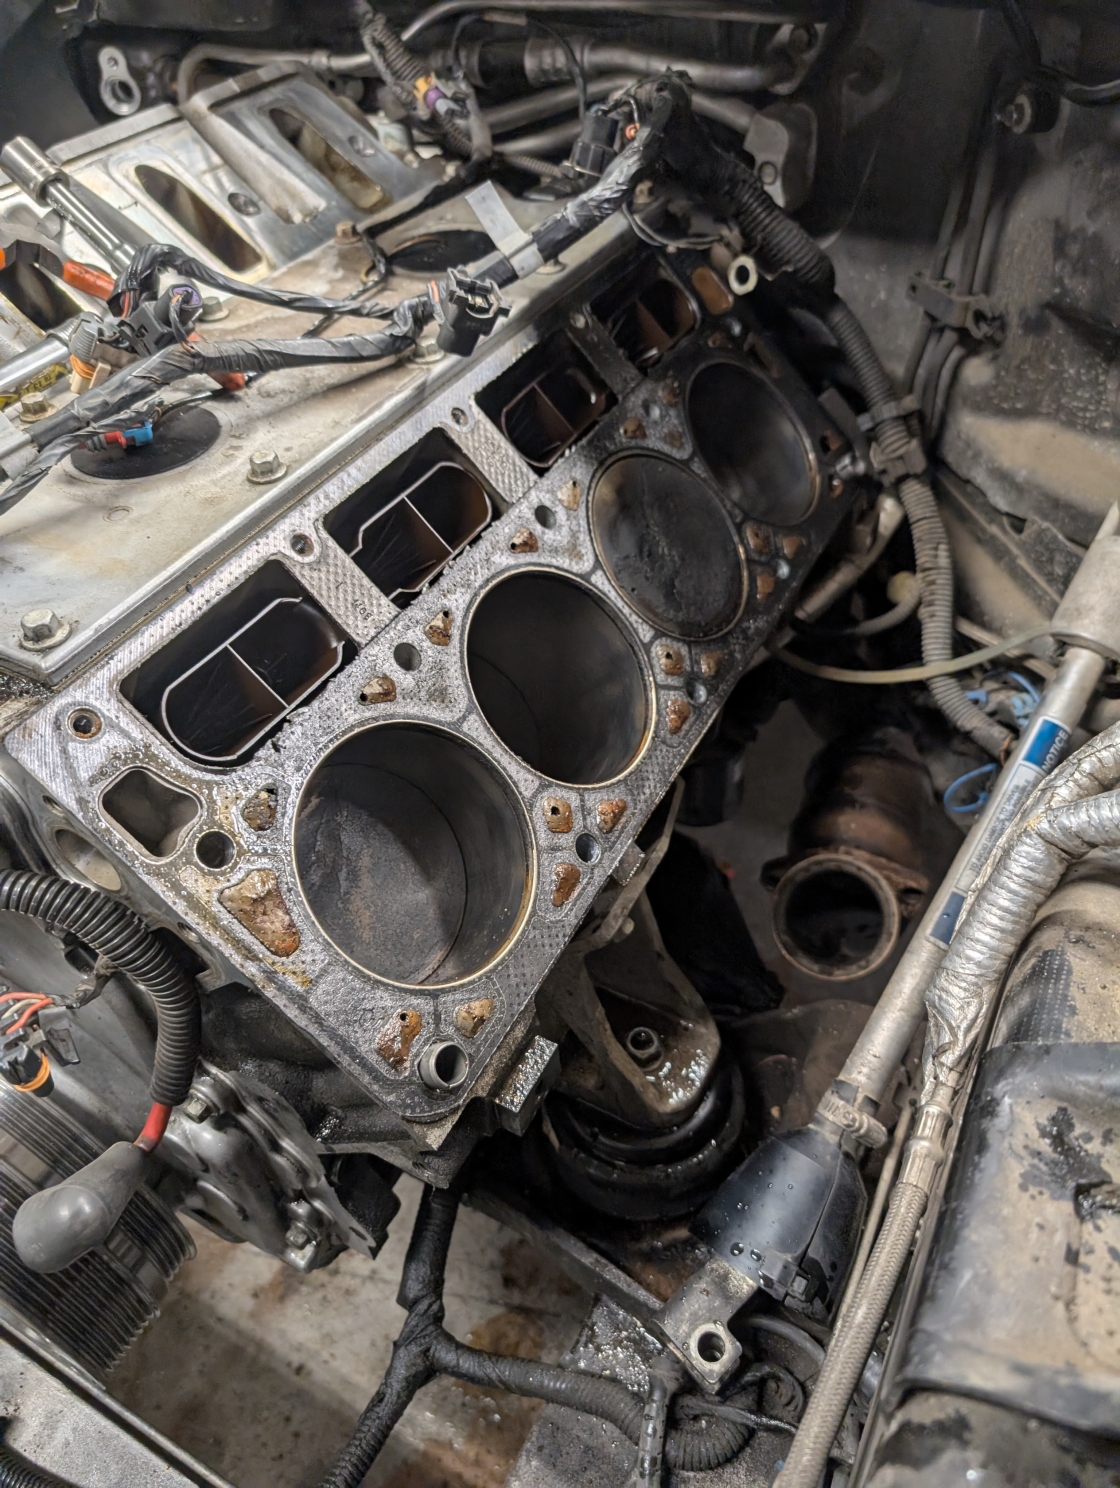
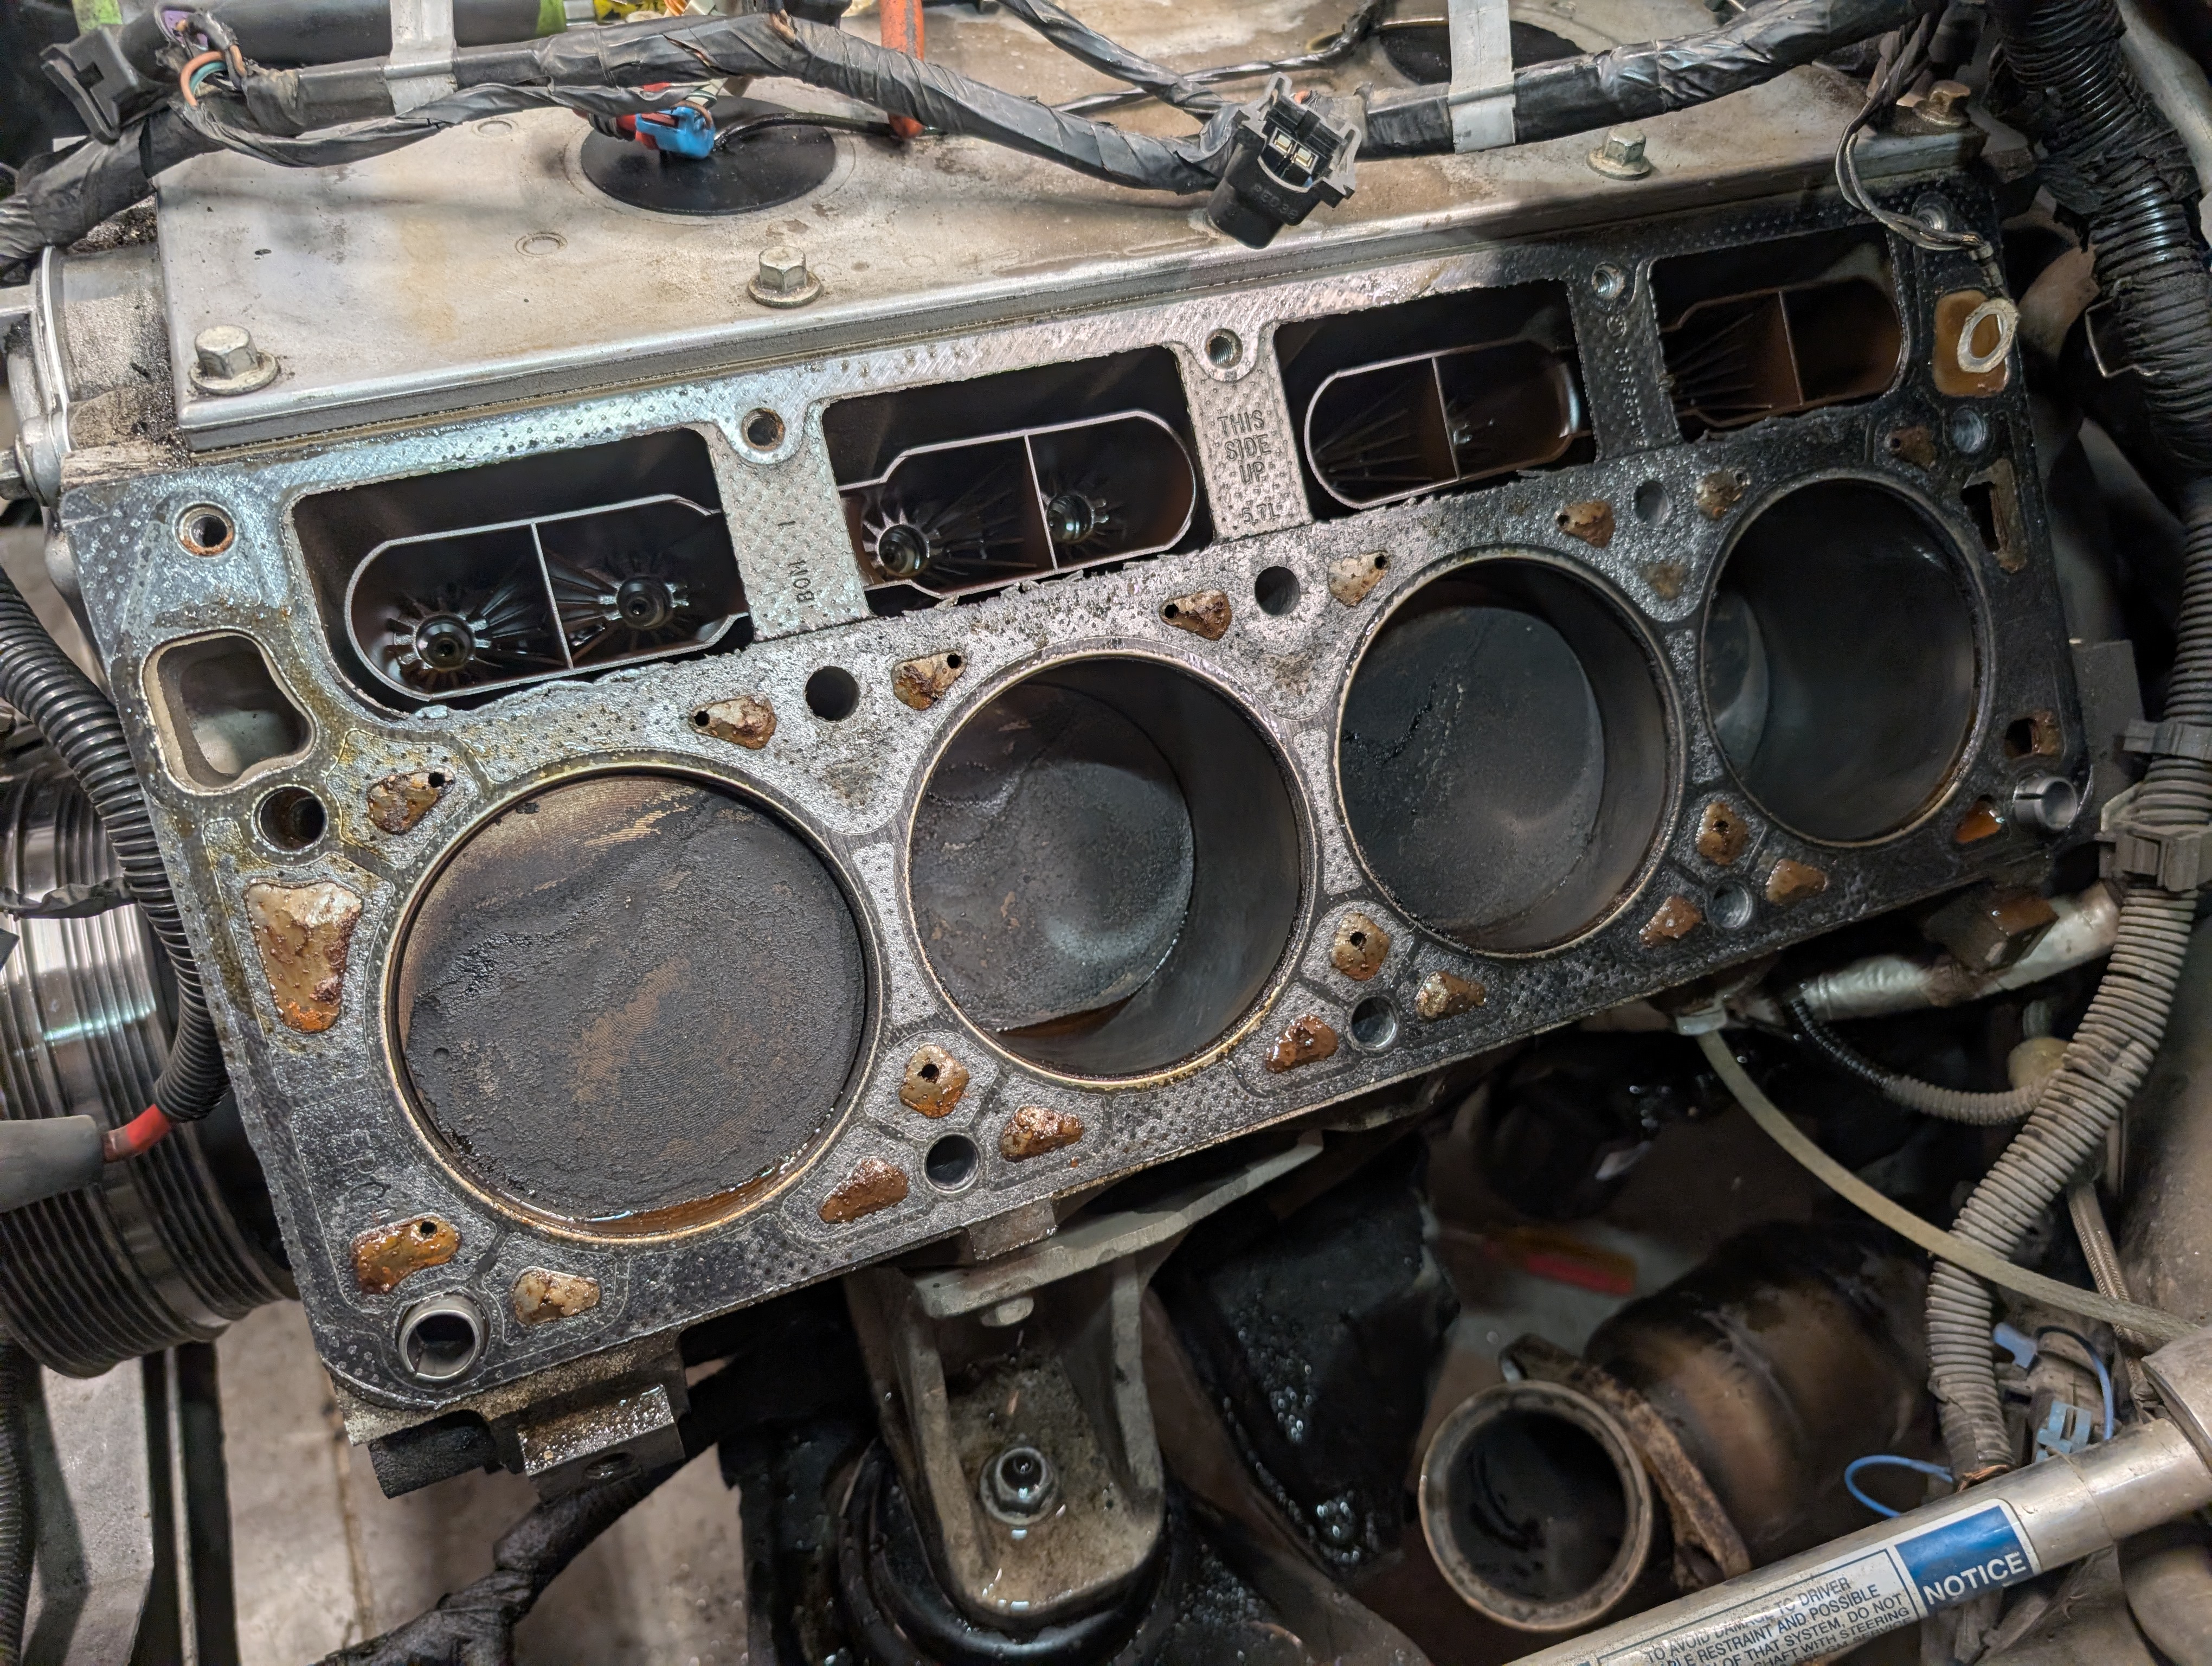
With the head removed you can start by inspecting the head gasket. You'll want to look for any signs that the head gasket was compromised allowing compressing or coolant or oil to move between the cylinders. As you can see on or factory original head gasket... there were no issues. LS1's pretty rarely have issues with head gaskets and are real tough motors... but it's worth an inspection while you're there.
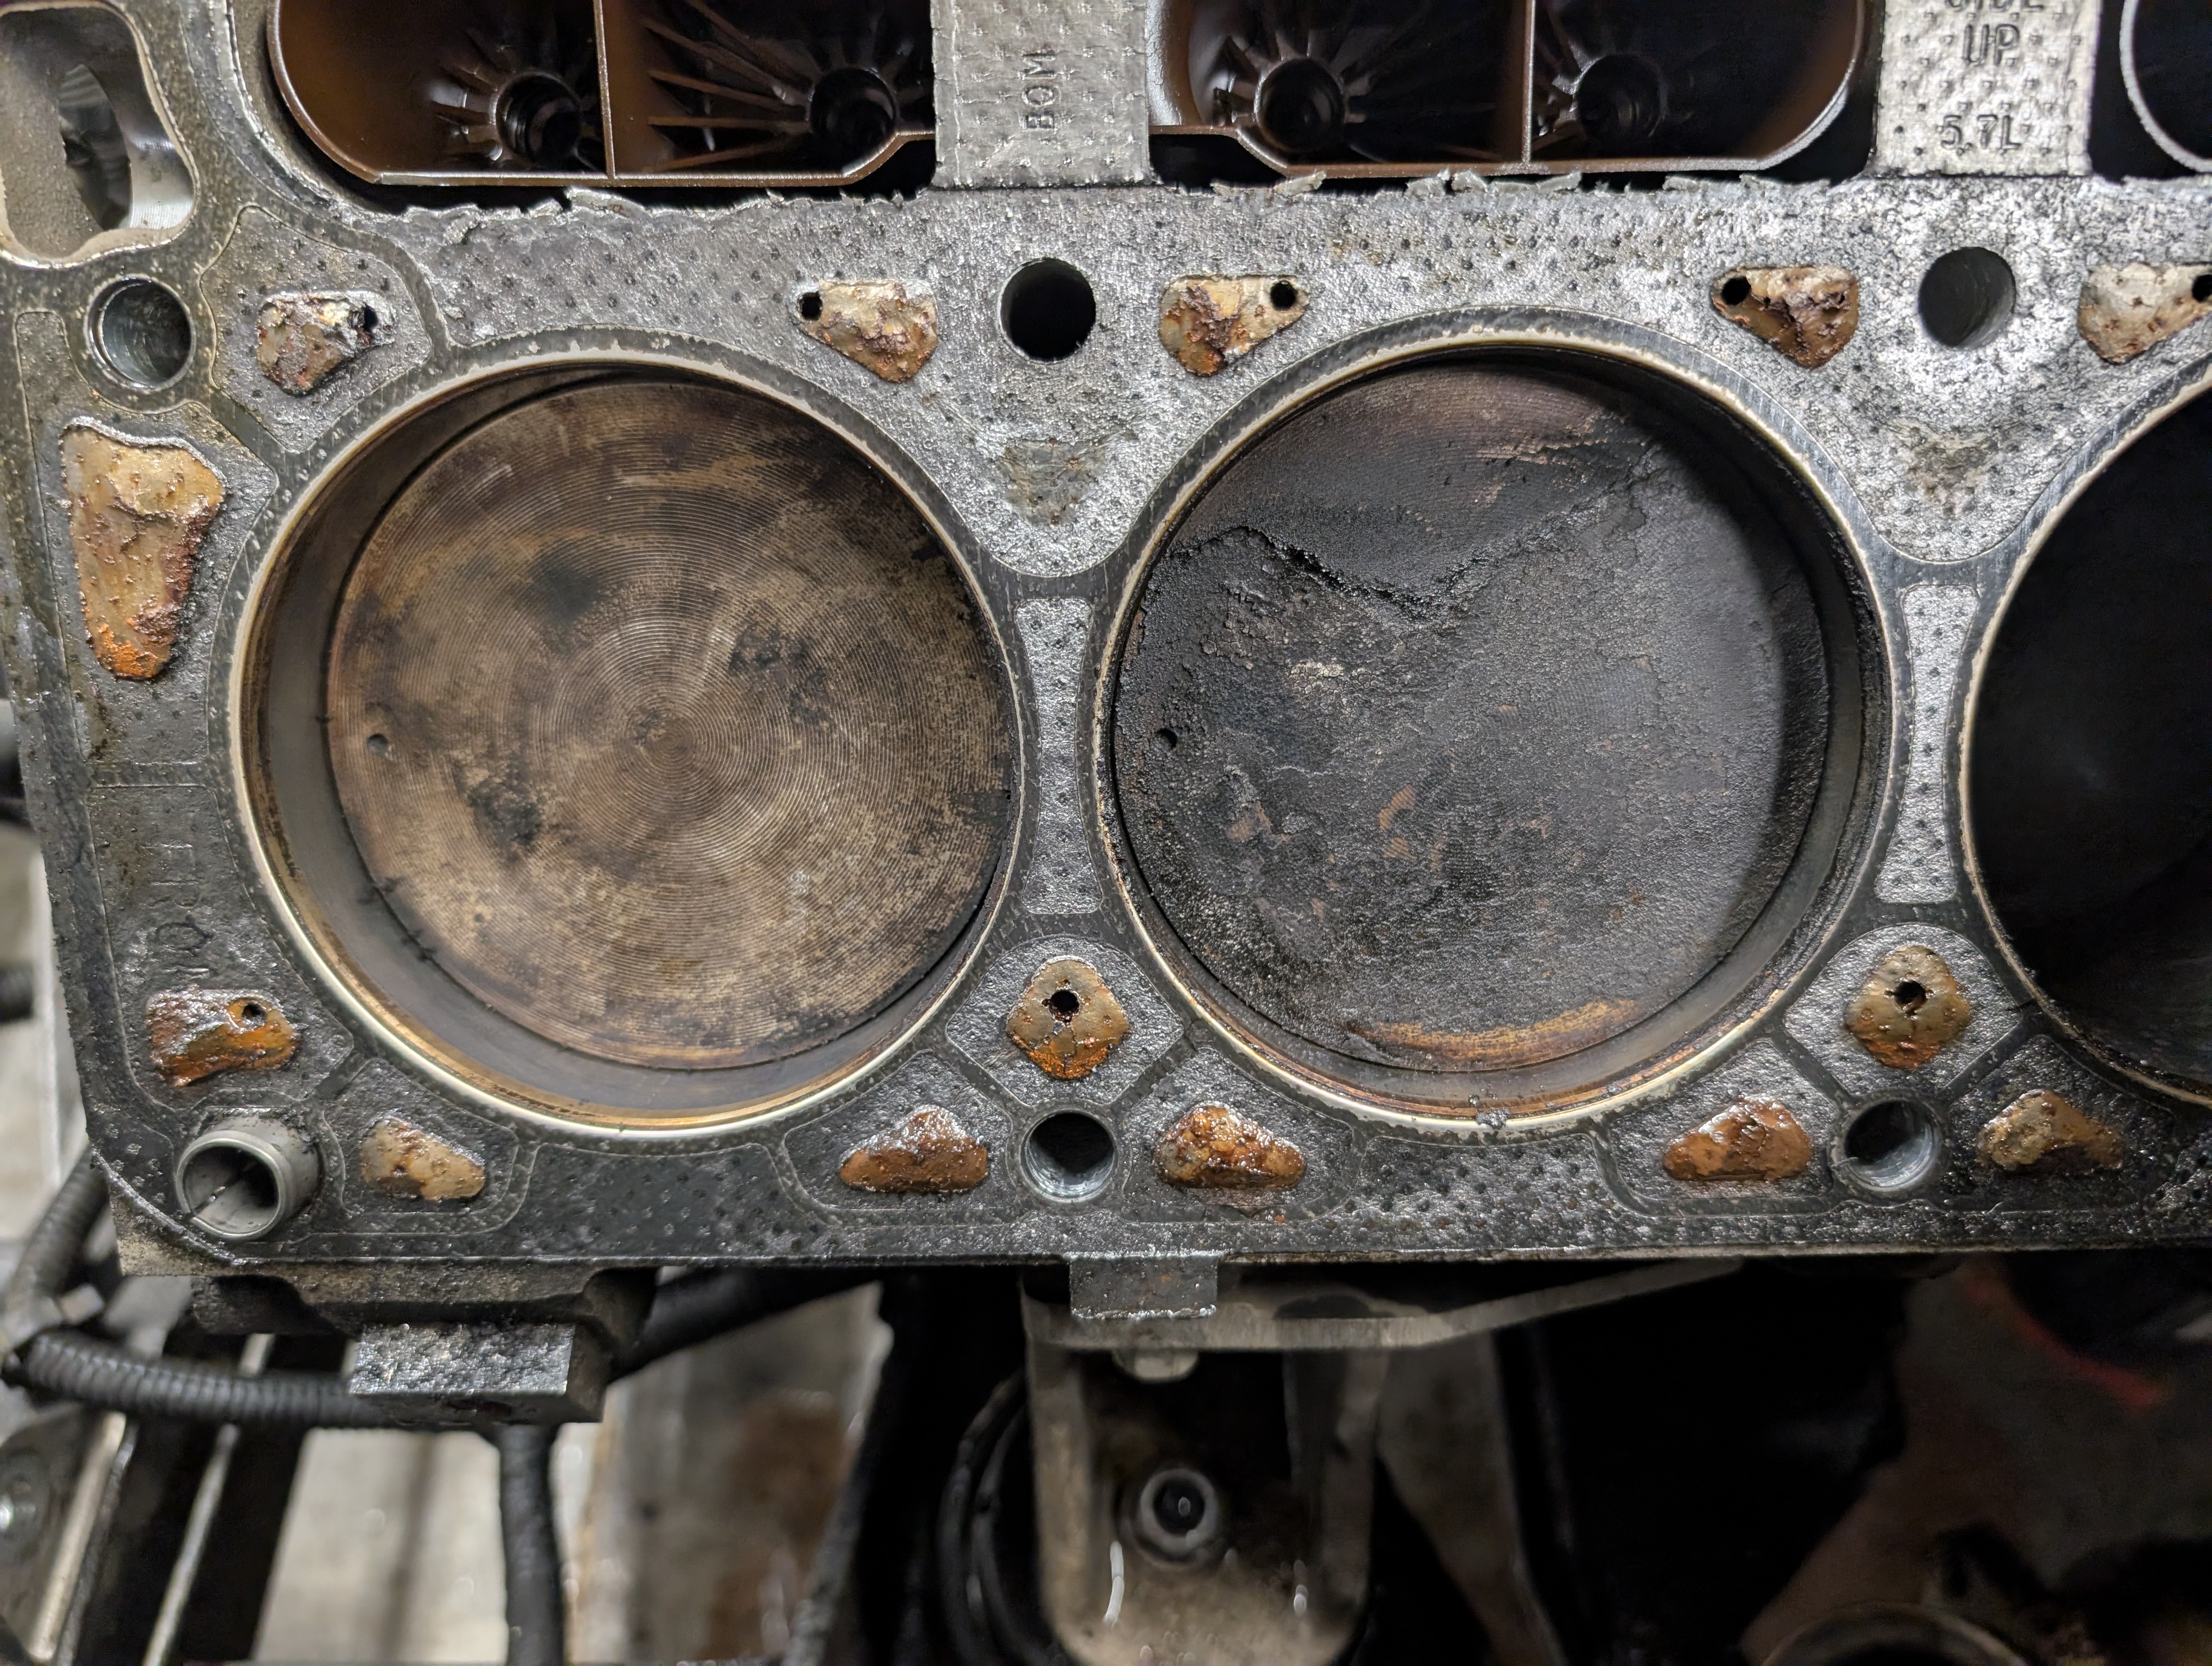
What you'll likely want to look at next is the state of your cylinder bores. When you first take a look, you'll likely notice a lot of carbon buildup on your pistons, lie we have above on the right. That's normal, don't stress. You can also ignore the piston on the left being cleaned, we scraped it clean to provide a visual demonstration of just what a clean cylinder would look like. Cyliners don't get that clean unless they're being steam cleaned by coolant. If you see this, it's worth taking a look at your headgasket or head for warping that may have allowed coolant by... but this wouldn't cause an engine whirr so we're down an odd path now. We endorse taking the time to scrape your pistons tops free of gunk while you're here like we did on the first piston (and later all pistons) and we simply used a razor blade and a ton of due caution. Do whatever you're comfortable with, or do nothing since the carbon isn't hurting anything and is technically bumping up compression being there.
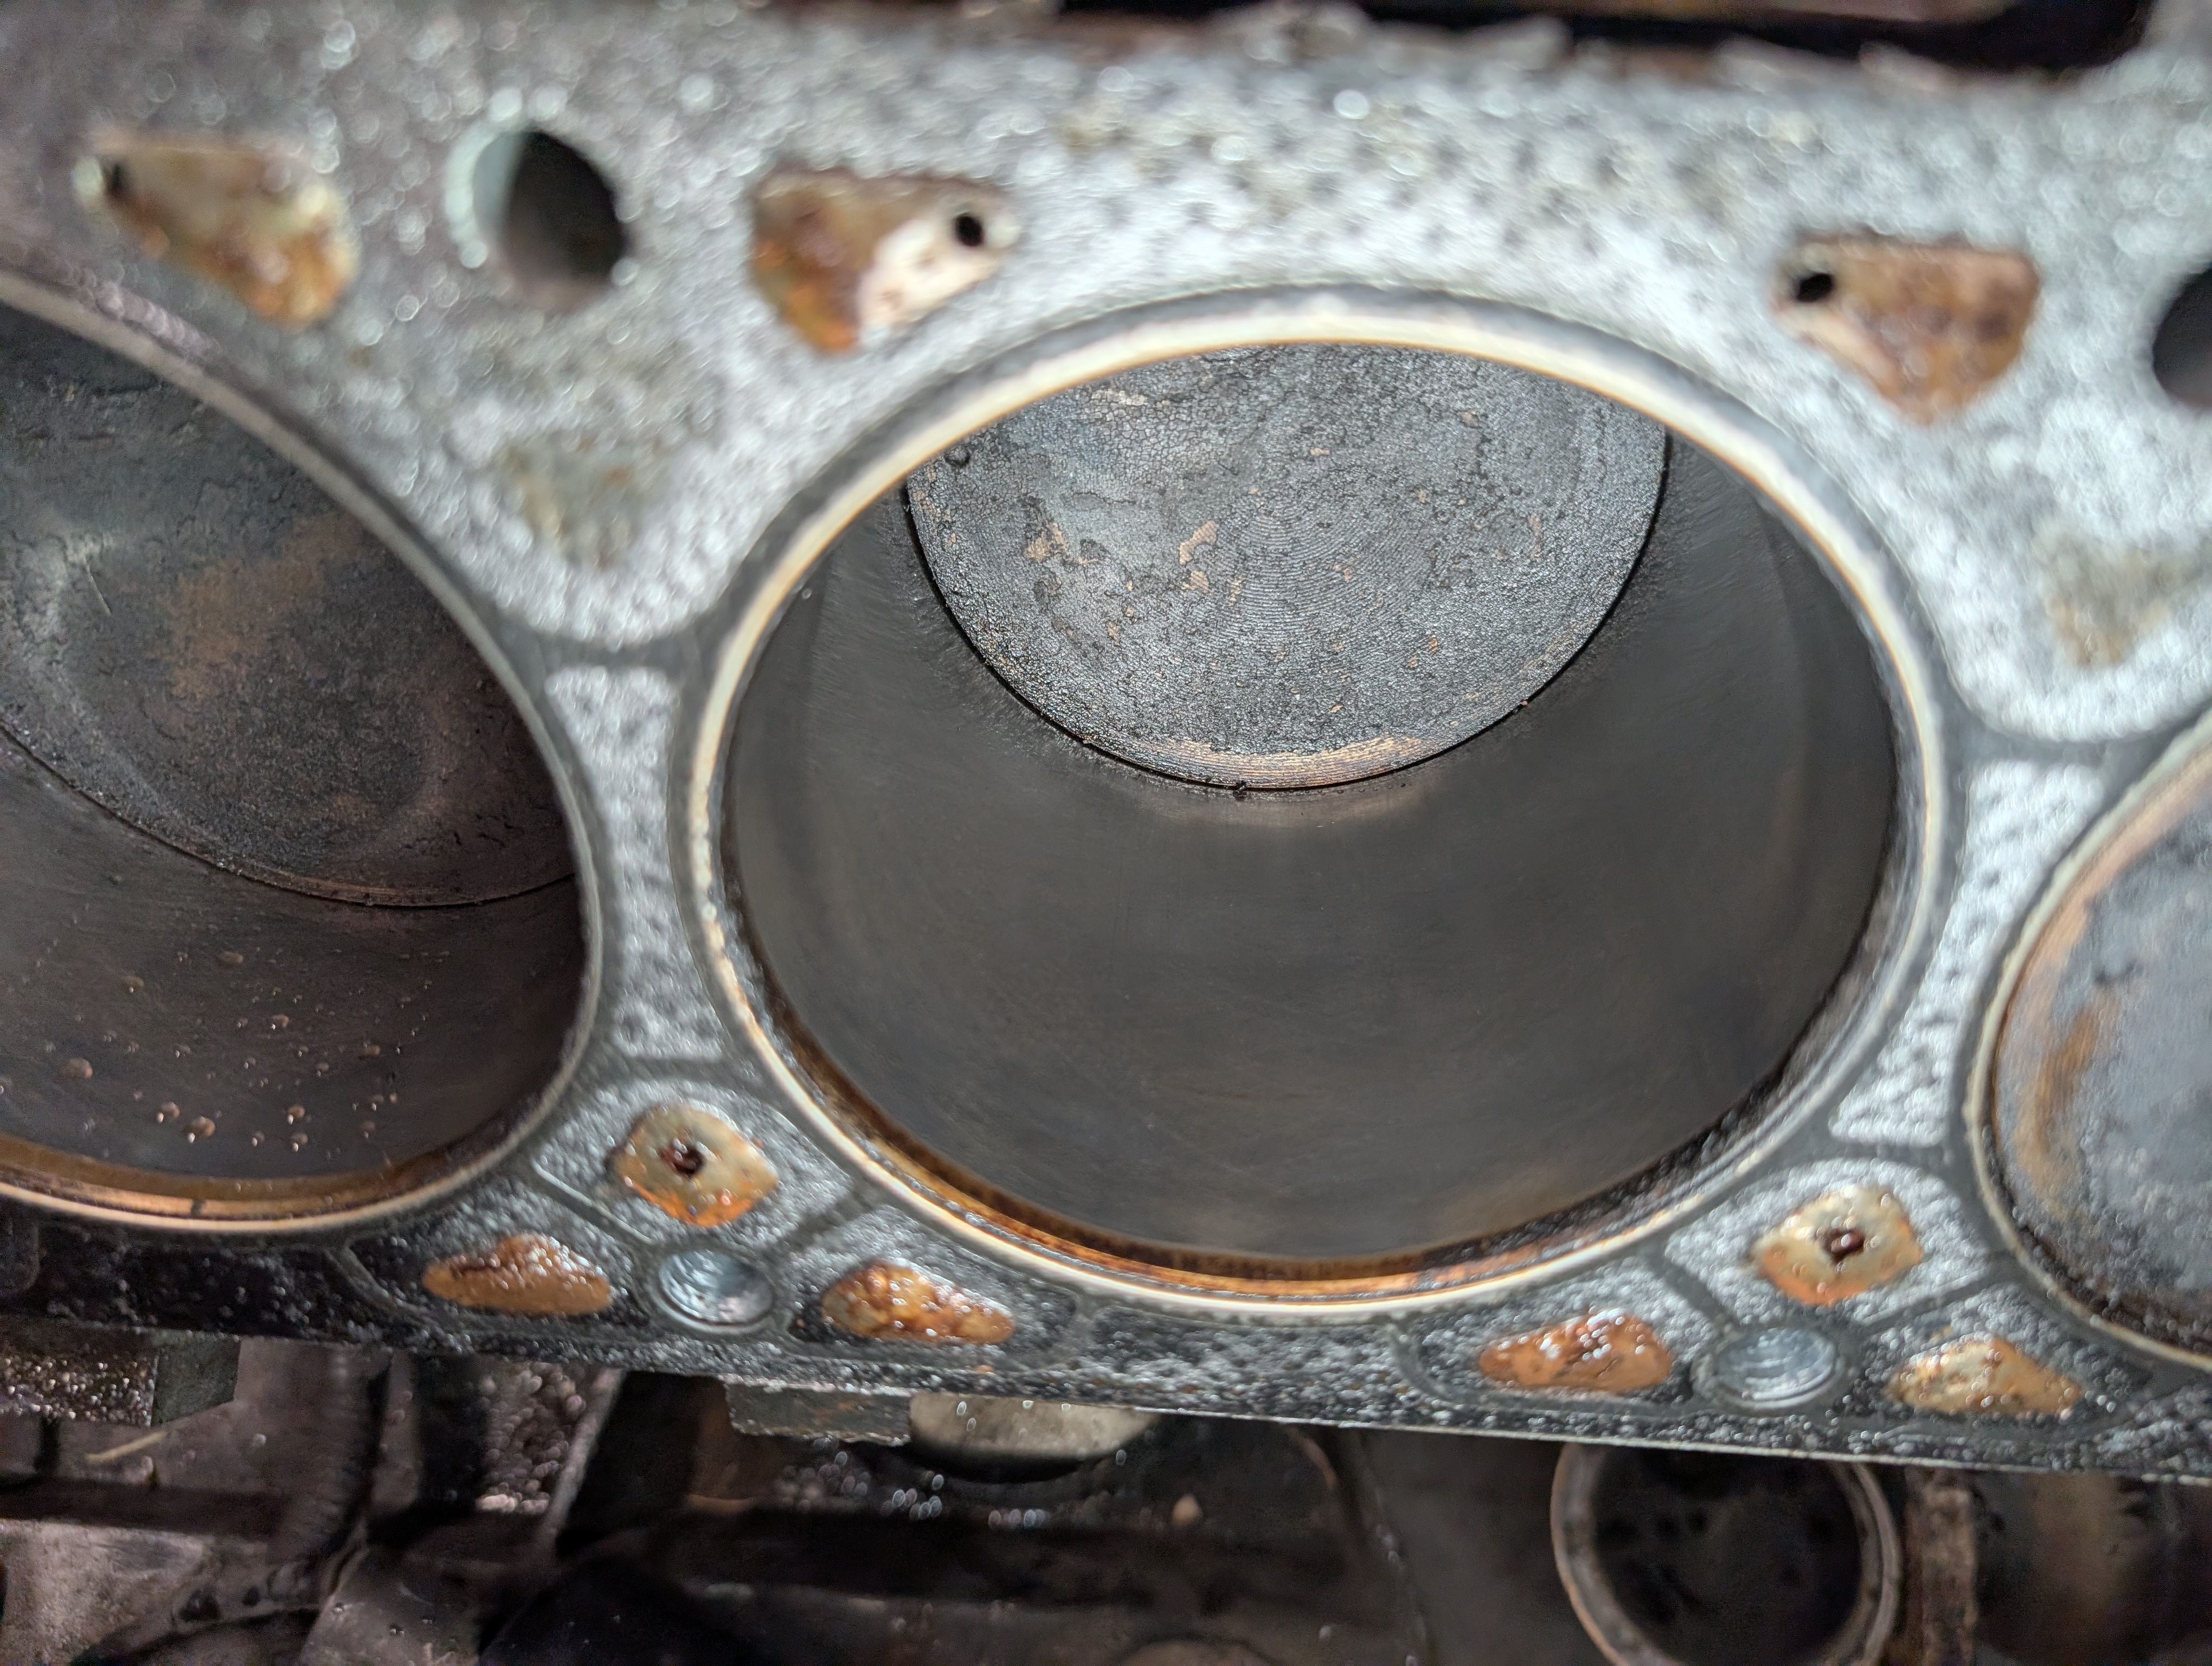
So what we wrote about that last step will take longer to read than you should spend on that task. What you need to really focus on is inspecting all of the cylinder bores now that you have a good luck. Clean the bores as there is likely some coolant that got into them from when you pulled the head (see the left one for an example) and turn the motor over until you can inspect the full bore. Ours were all clean with decent factory cross hatching still visible. While this is again unlikely to be relevant to a whirr... we're really just eliminating EVERYTHING to be certain the motor is health.
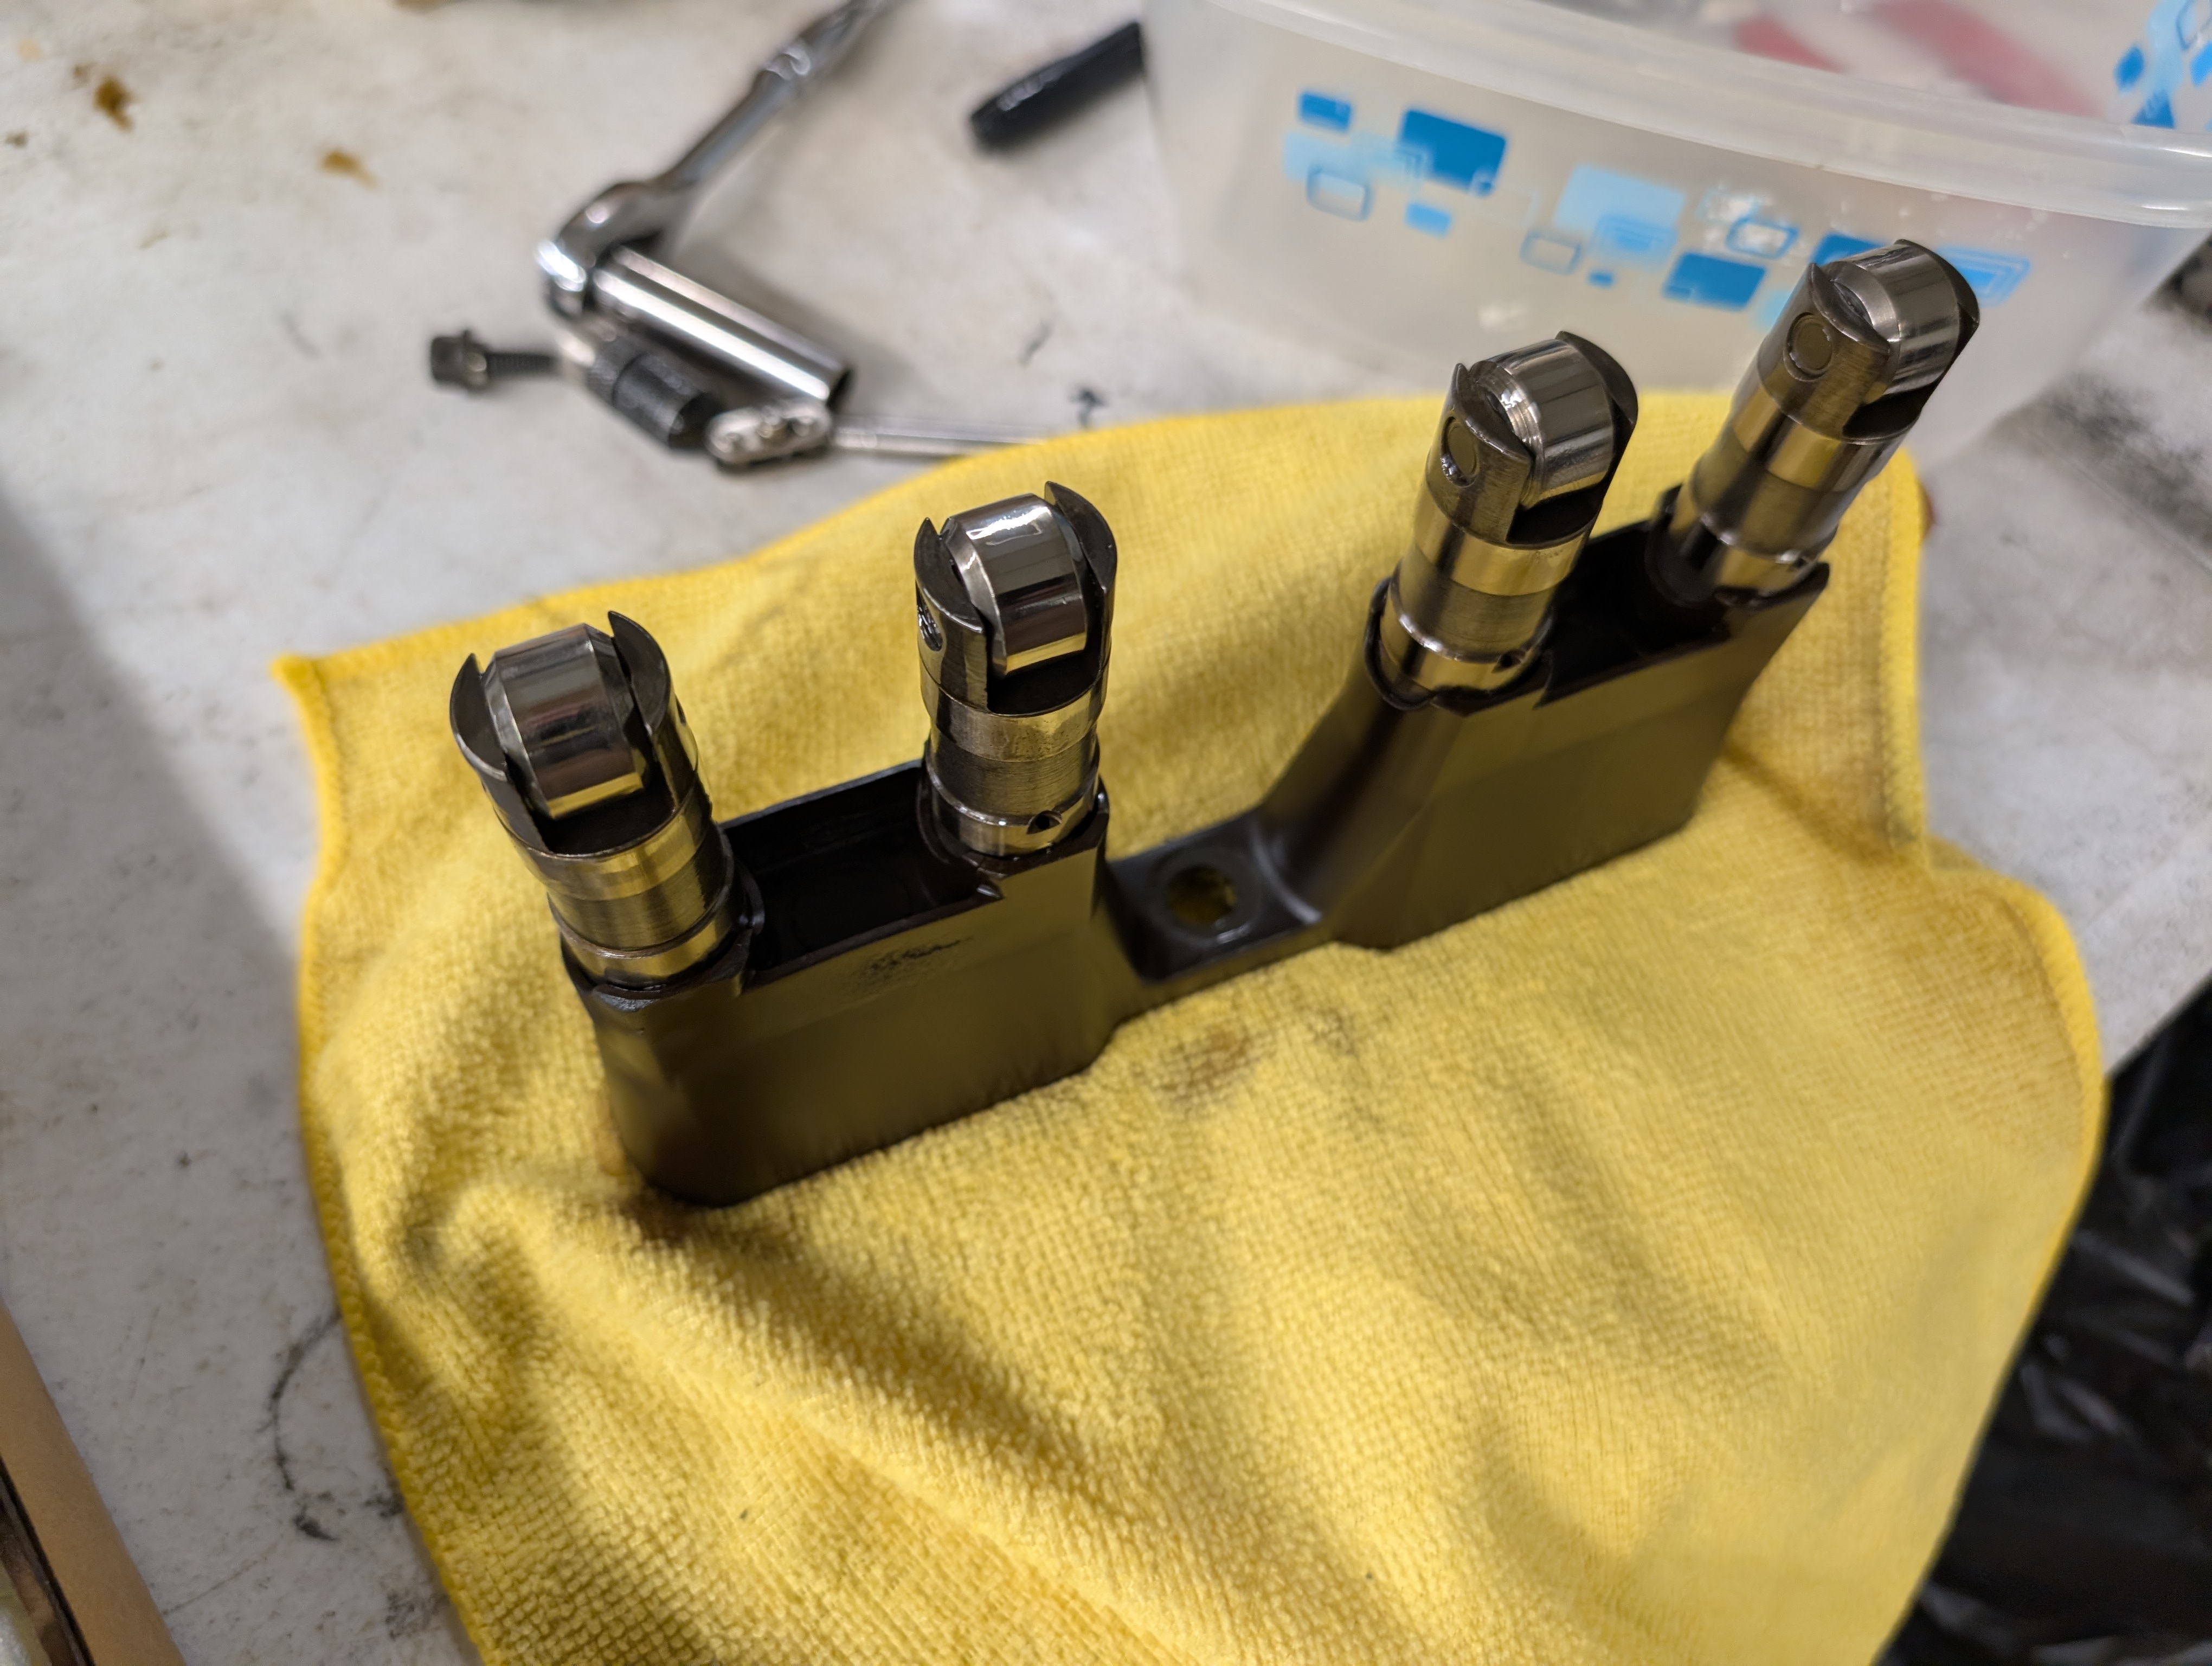
Now the heads are off and you are confident that the cylinders are good... it's time to move on to the lifters. Oh these dastardly lifters everyone says are the source of problems. Honestly, we've heard few confirmed tales of lifter failures on stock motors like this one... but if you're going to get in here you may as well pull them, inspect them, and upgrade to the superior LS7 style lifters.

So nearly all of our lifters were perfectly smooth... but a few had really mild lines like this in them. This honestly isn't anything major to stress about. Eratic wear all across the face of the lifter though, that is to be concerned about. These however are no big deal.
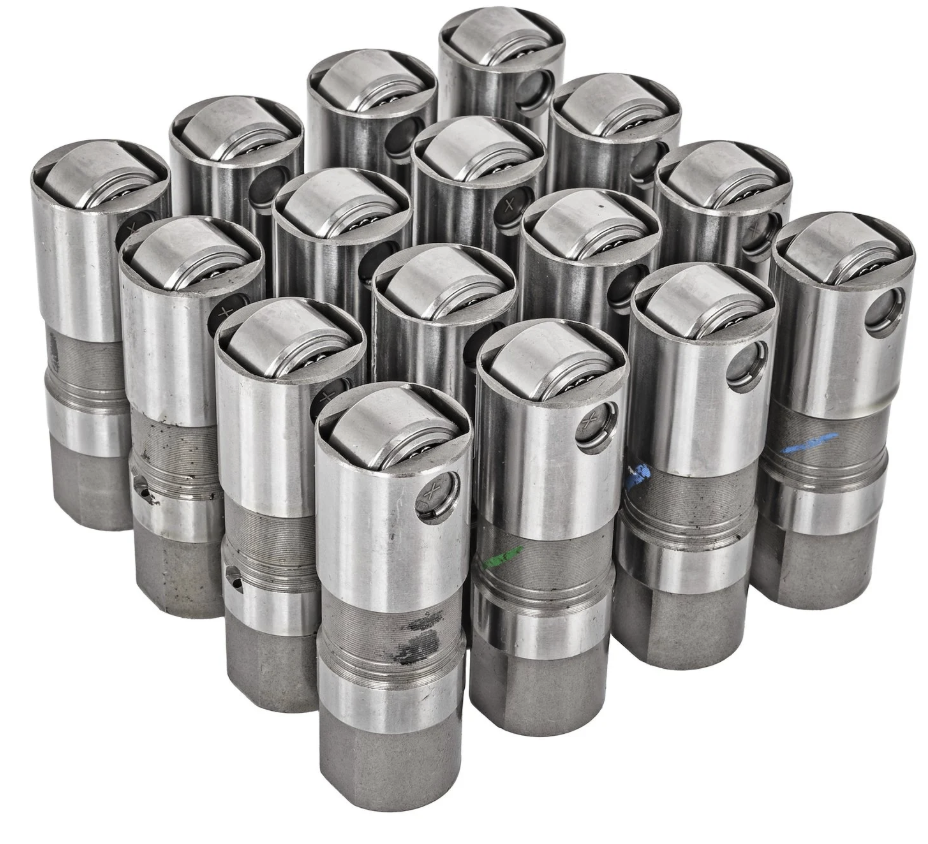
We didn't capture any pictures of installing our new LS7 style lifters as it's an oily process that had our hands free... but the above is a manufacturer picture of LS7 style lifters, and the biggest difference as you can see is the roller on the hydraulic lifter is supported all the way around. These have superior reliability and durability to the OEM LS1 lifters, and since you can't even get LS1 style lifters anyways... you may as well reinstall some legitimate LS7 style lifters while you're here!
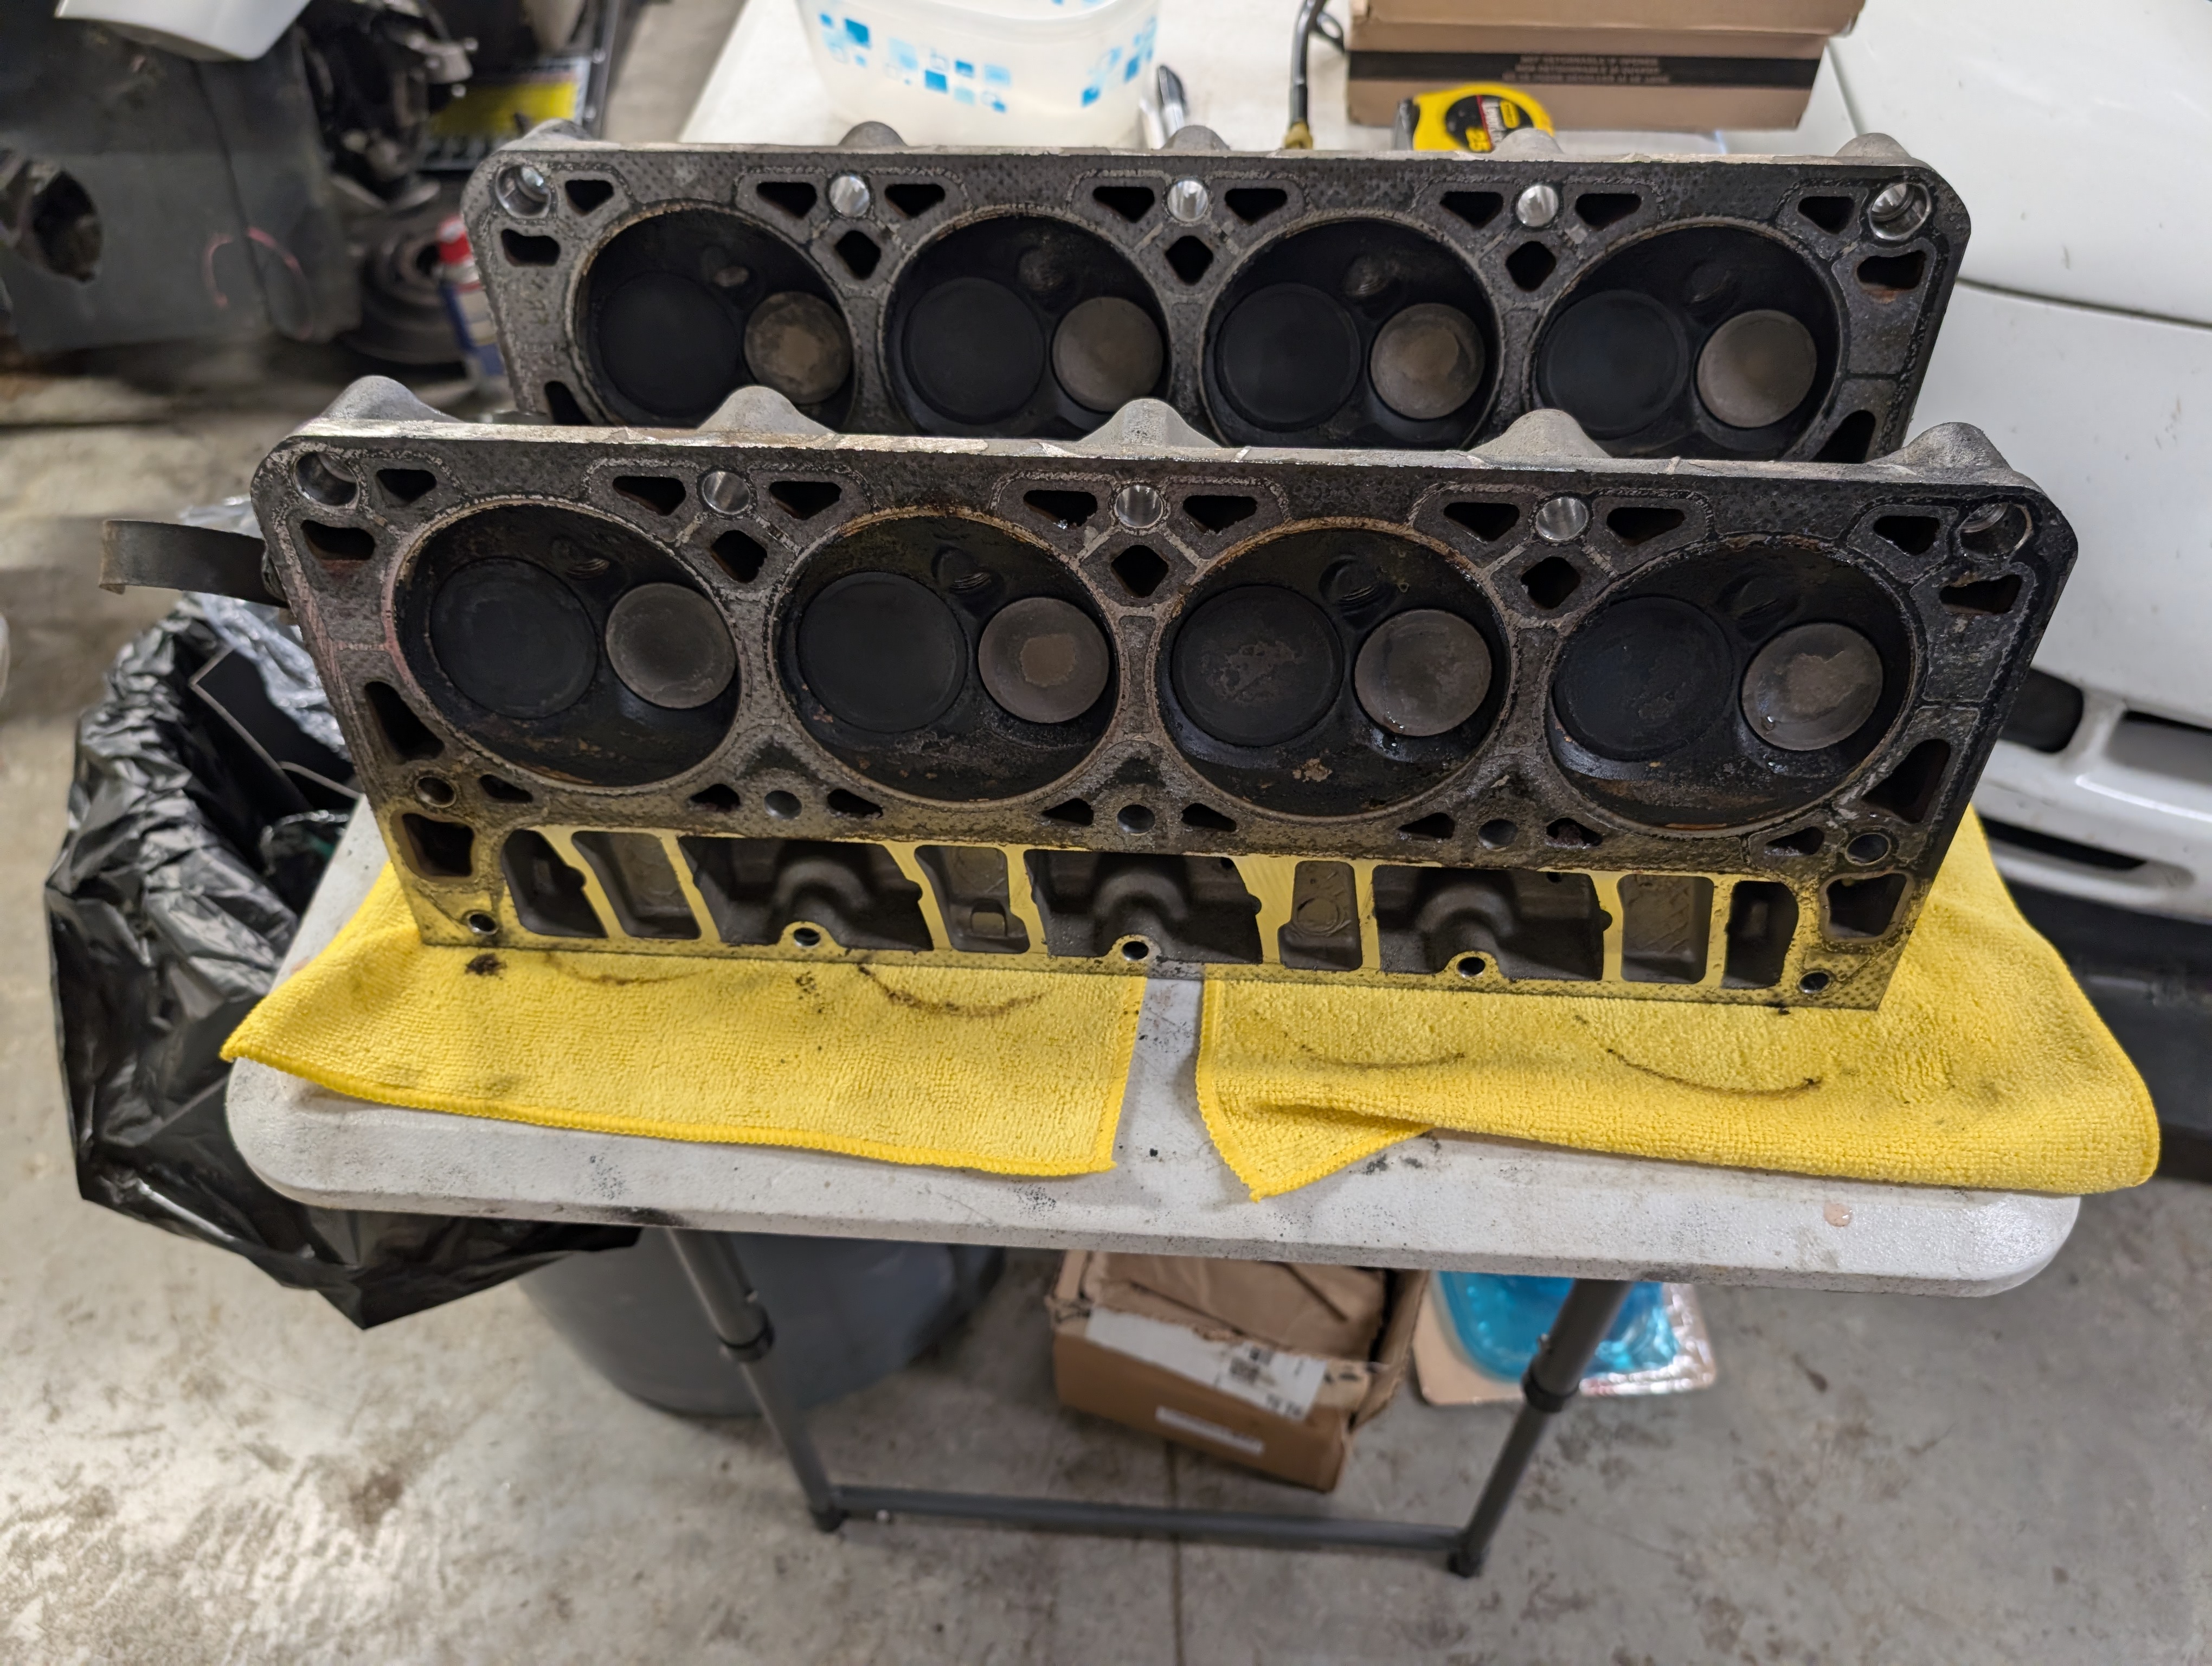
if you thought the carbon buildup was going to be limited to just your piston tops... think again! Your cylinders are likely a bit gross as well and will be needing some attention. We chose to take our cylinder heads to a local machine shop to have them check everything out and go through the entire heads, replacing all of the springs, valve steams and checking seals in general. We chose not to pay for the pressure testing though to look for cracks, as honestly with our exceptional compression numbers and what not.. we felt confident the heads were A-okay.
Now Just Do It All Backwards, Easy Right?
We're going to spare you all the umpteenth article on how to put the heads back on. Odds are slim we're going to provide any information you don't already have. What we will add though is a few minor tips and tricks we've found that makes install easier. First off, scrap the old gasket material off of course, but don't fear the razor blade for scraping. Odds are pretty slim you're going to get whatever the 20+ year old factoyr gaskets turned into off with anything besides a metal edge and some spite. Just be cautious and dilligent to not excessively dig into the softer aluminum, and all will be well.
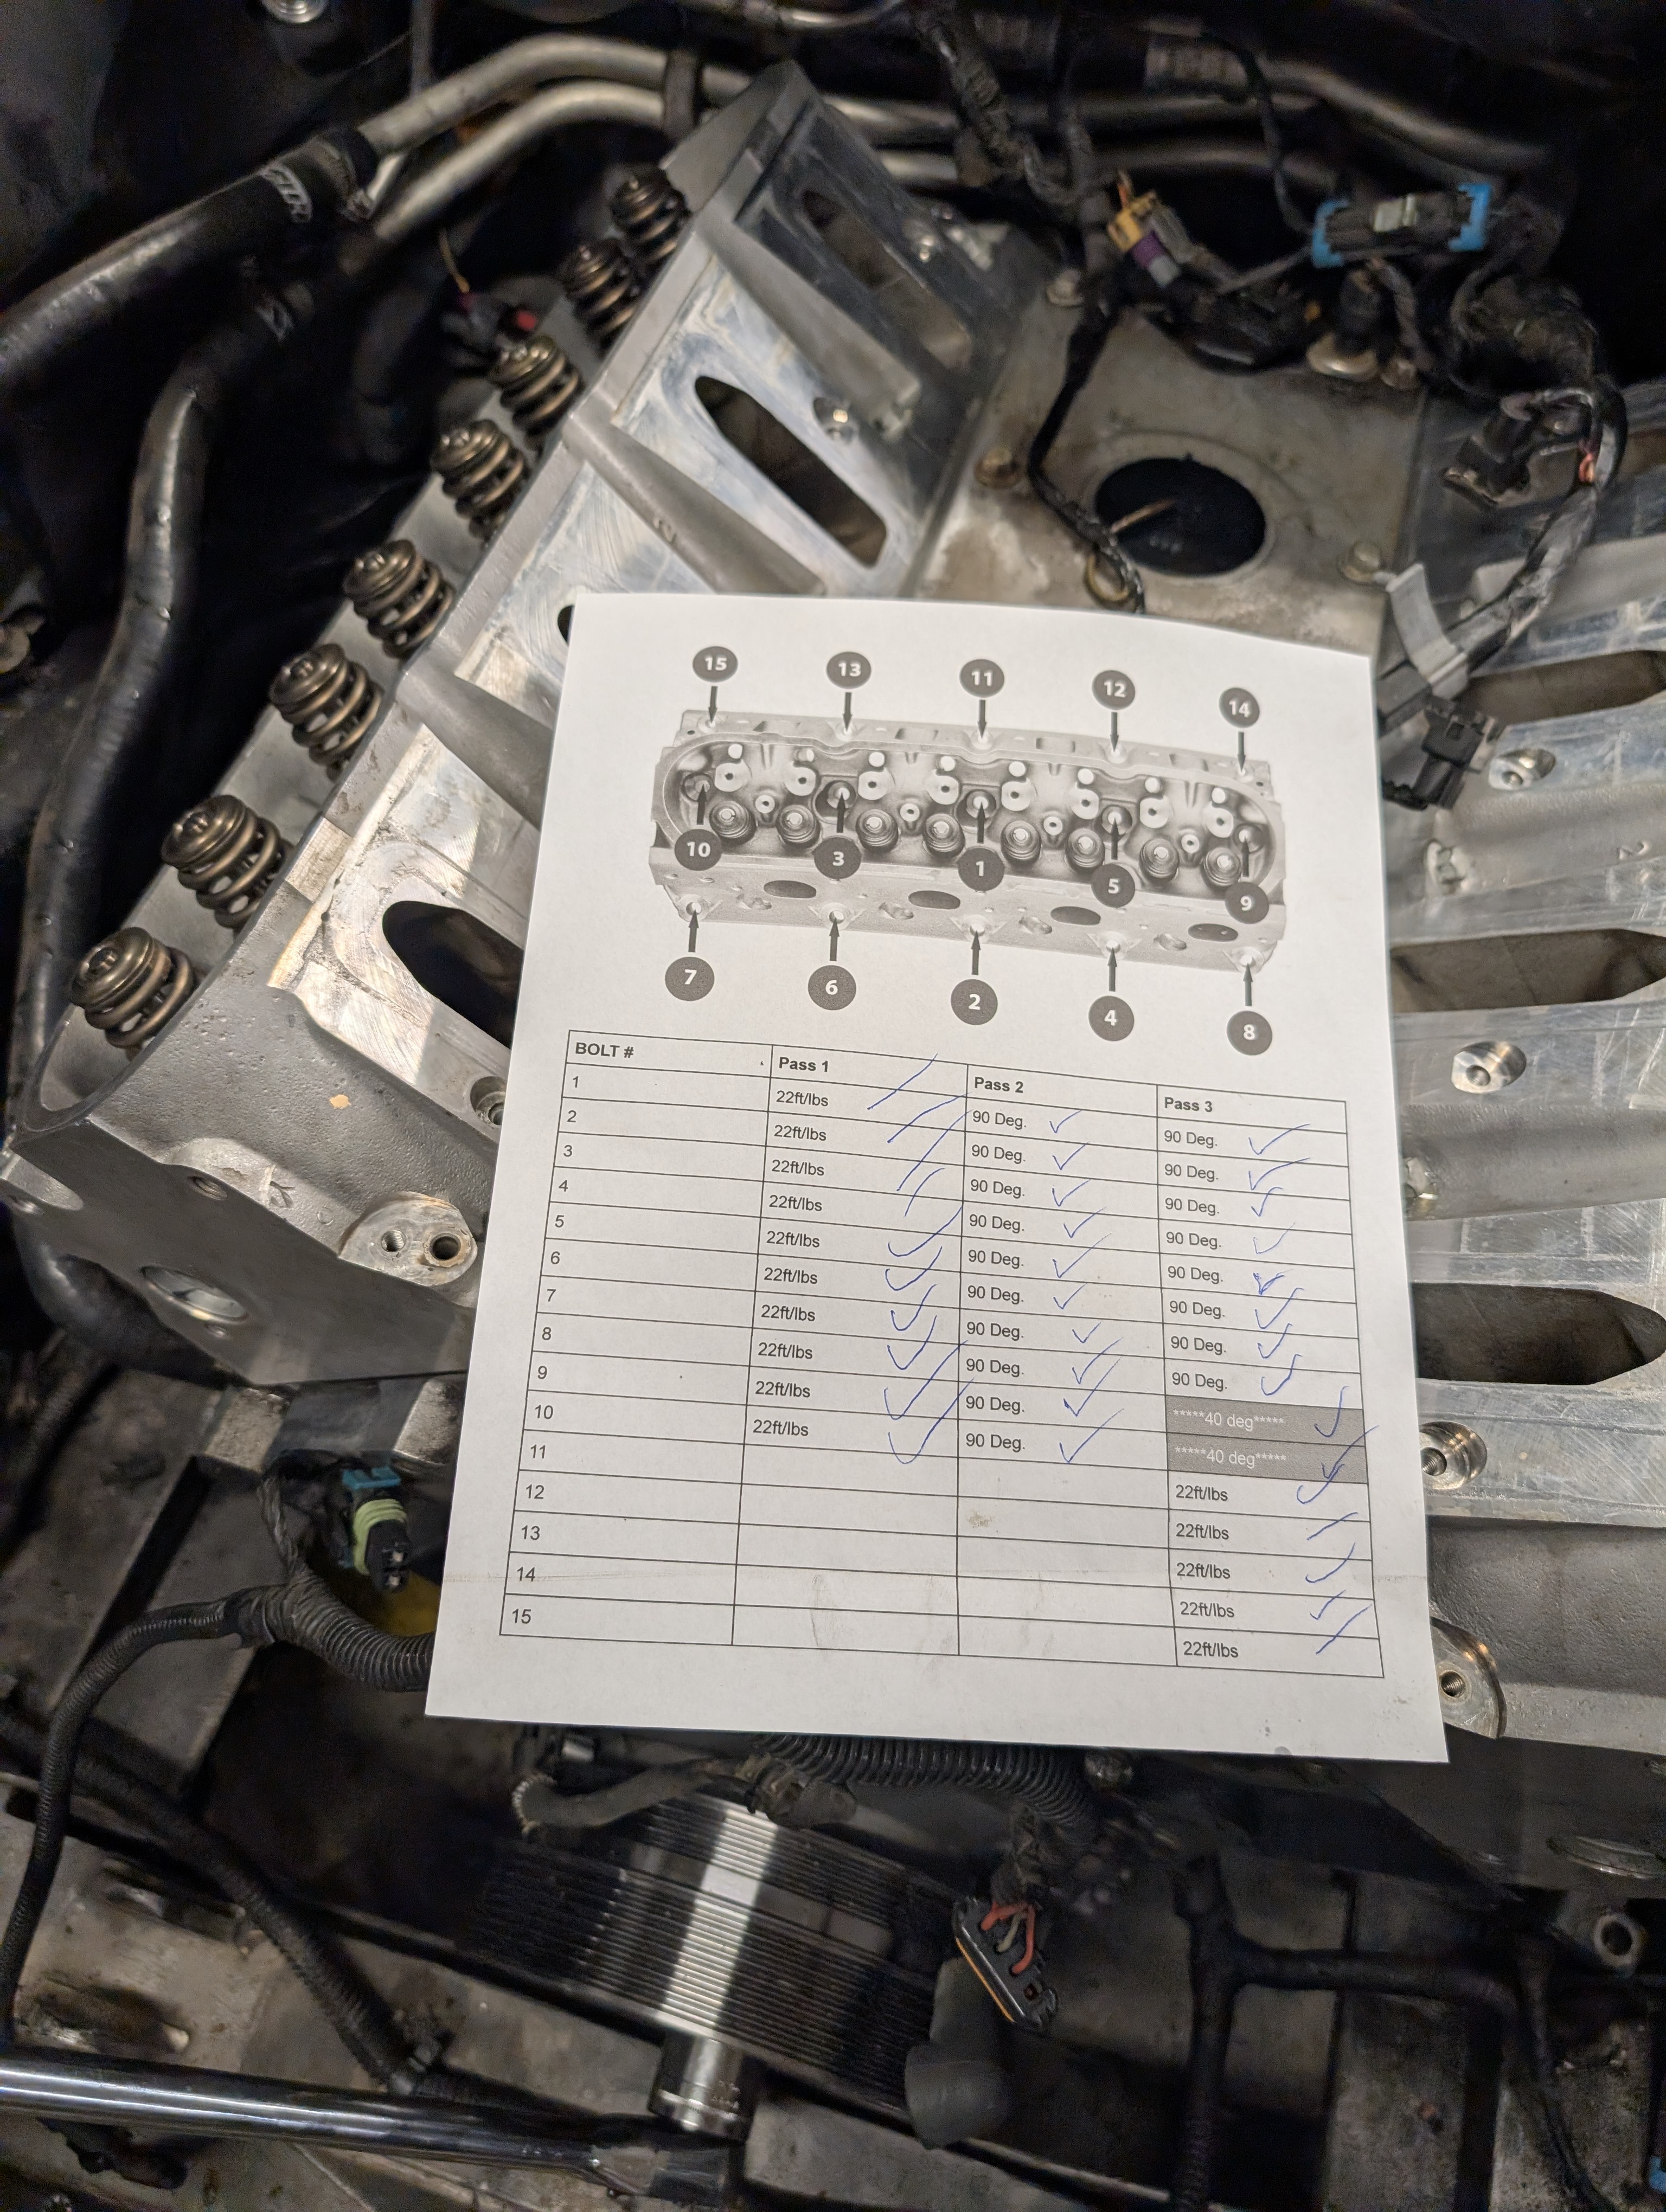
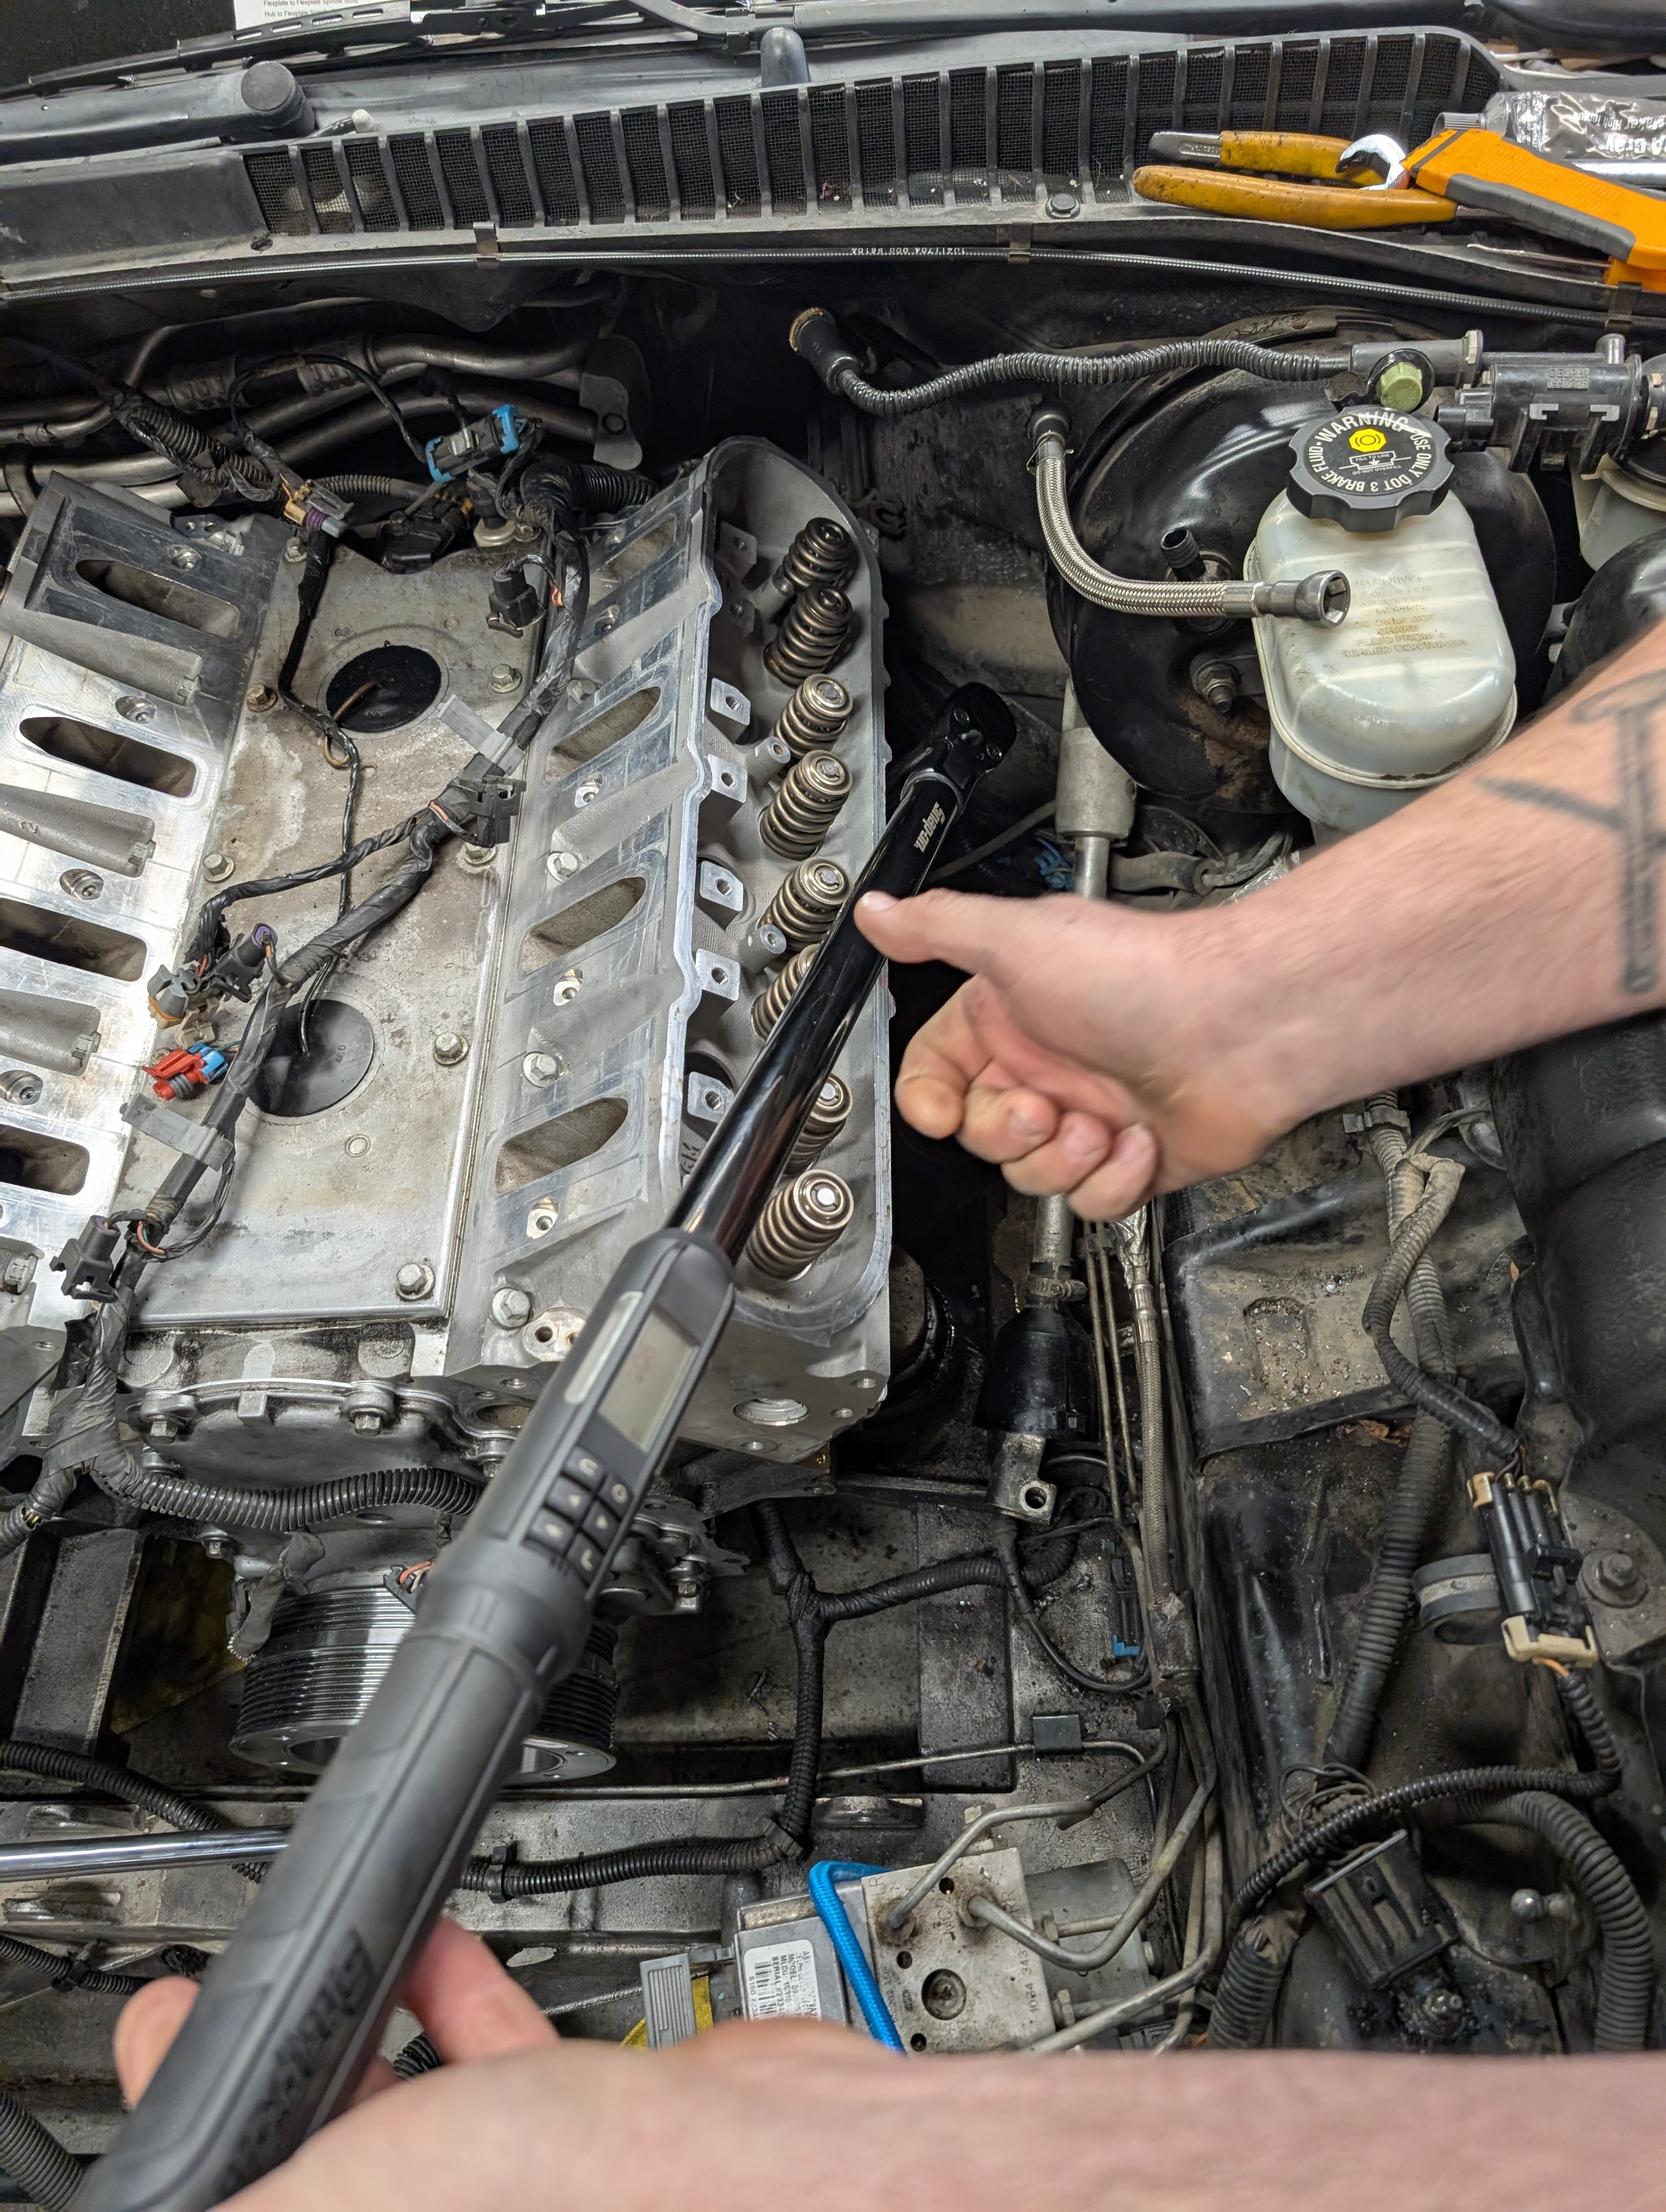
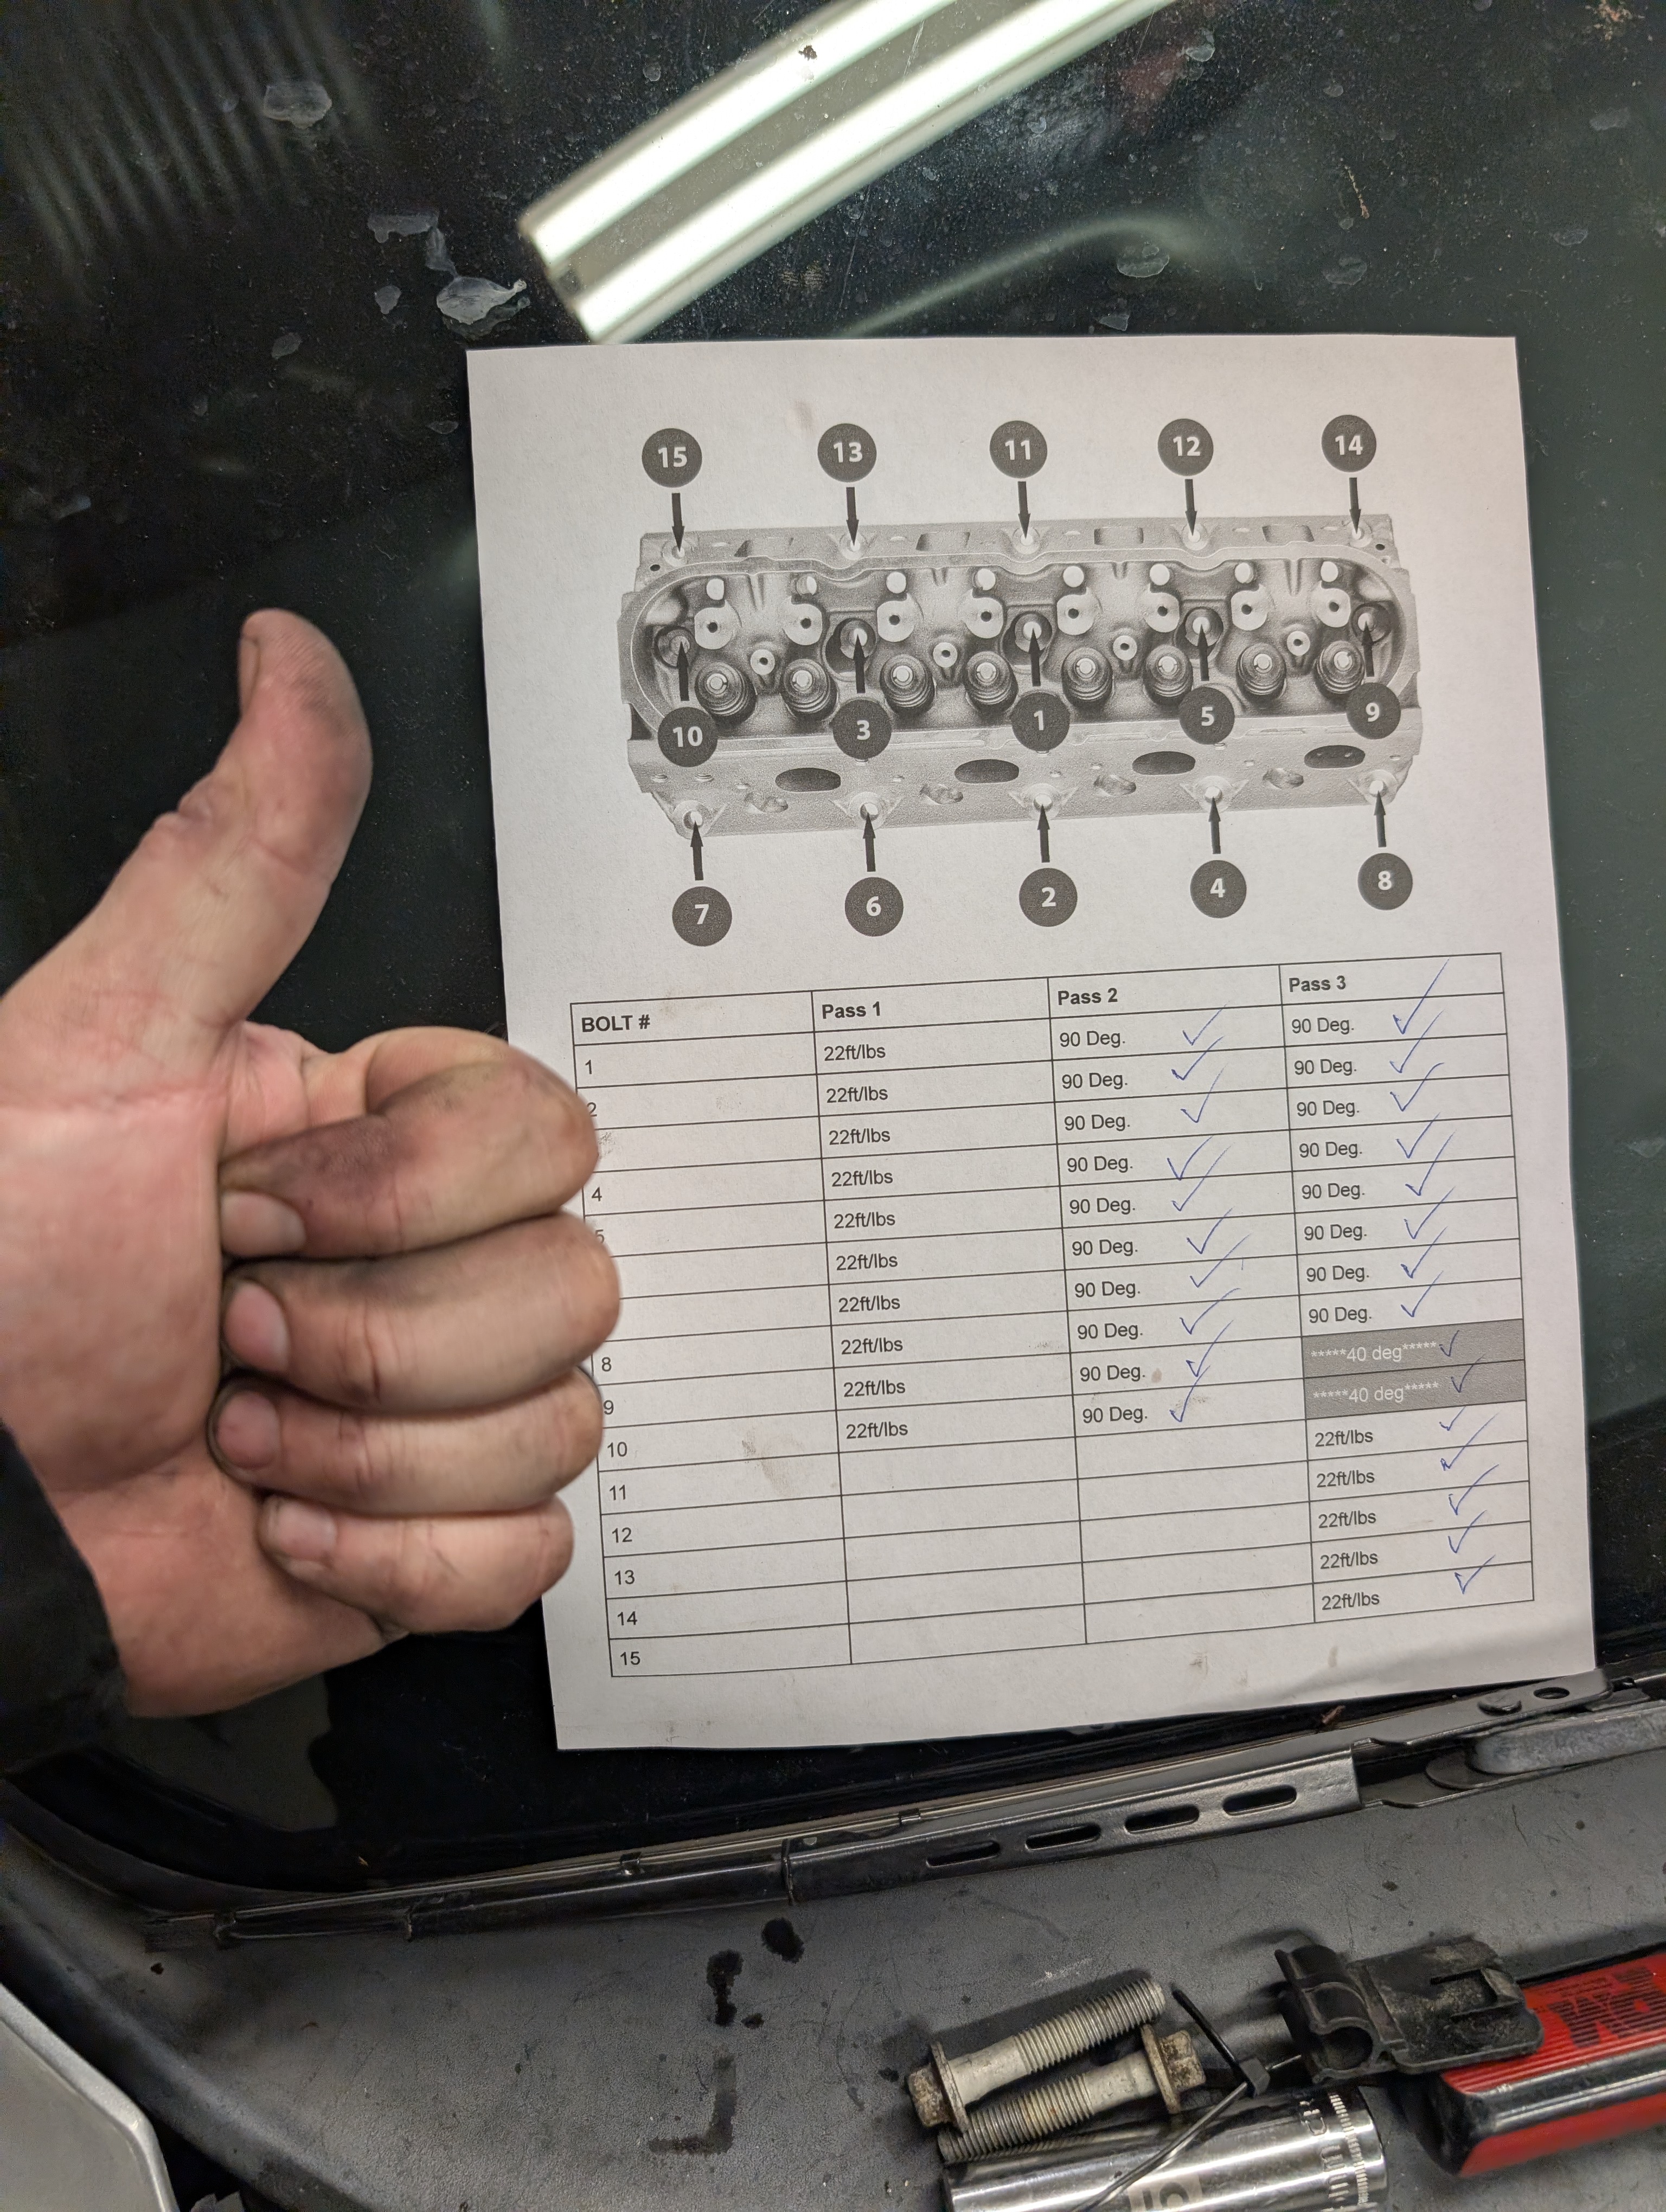
Next up what we recommend is printing off some of Shred Jesse's head bolt pattern documents. They have the bolt pattern and numbers picture along with torque and then angle values. Check everything off as you go and it'll be surprisingly quick.
Now this is of course for using factory style bolts. You can get ARP reusable bolts but... for most builds you don't need that level of bolt. Add in that the bolt is threading into aluminum anyways and... well it's hard to justify for most cars under 475whp (on a dynojet that is, 475 on a mustang dyno is legit). The bolts are cheap, they're torque to yield aka single use, and odds you're going back in here are generally pretty damn low so you are not going to get your moneys worth out of modifying them.
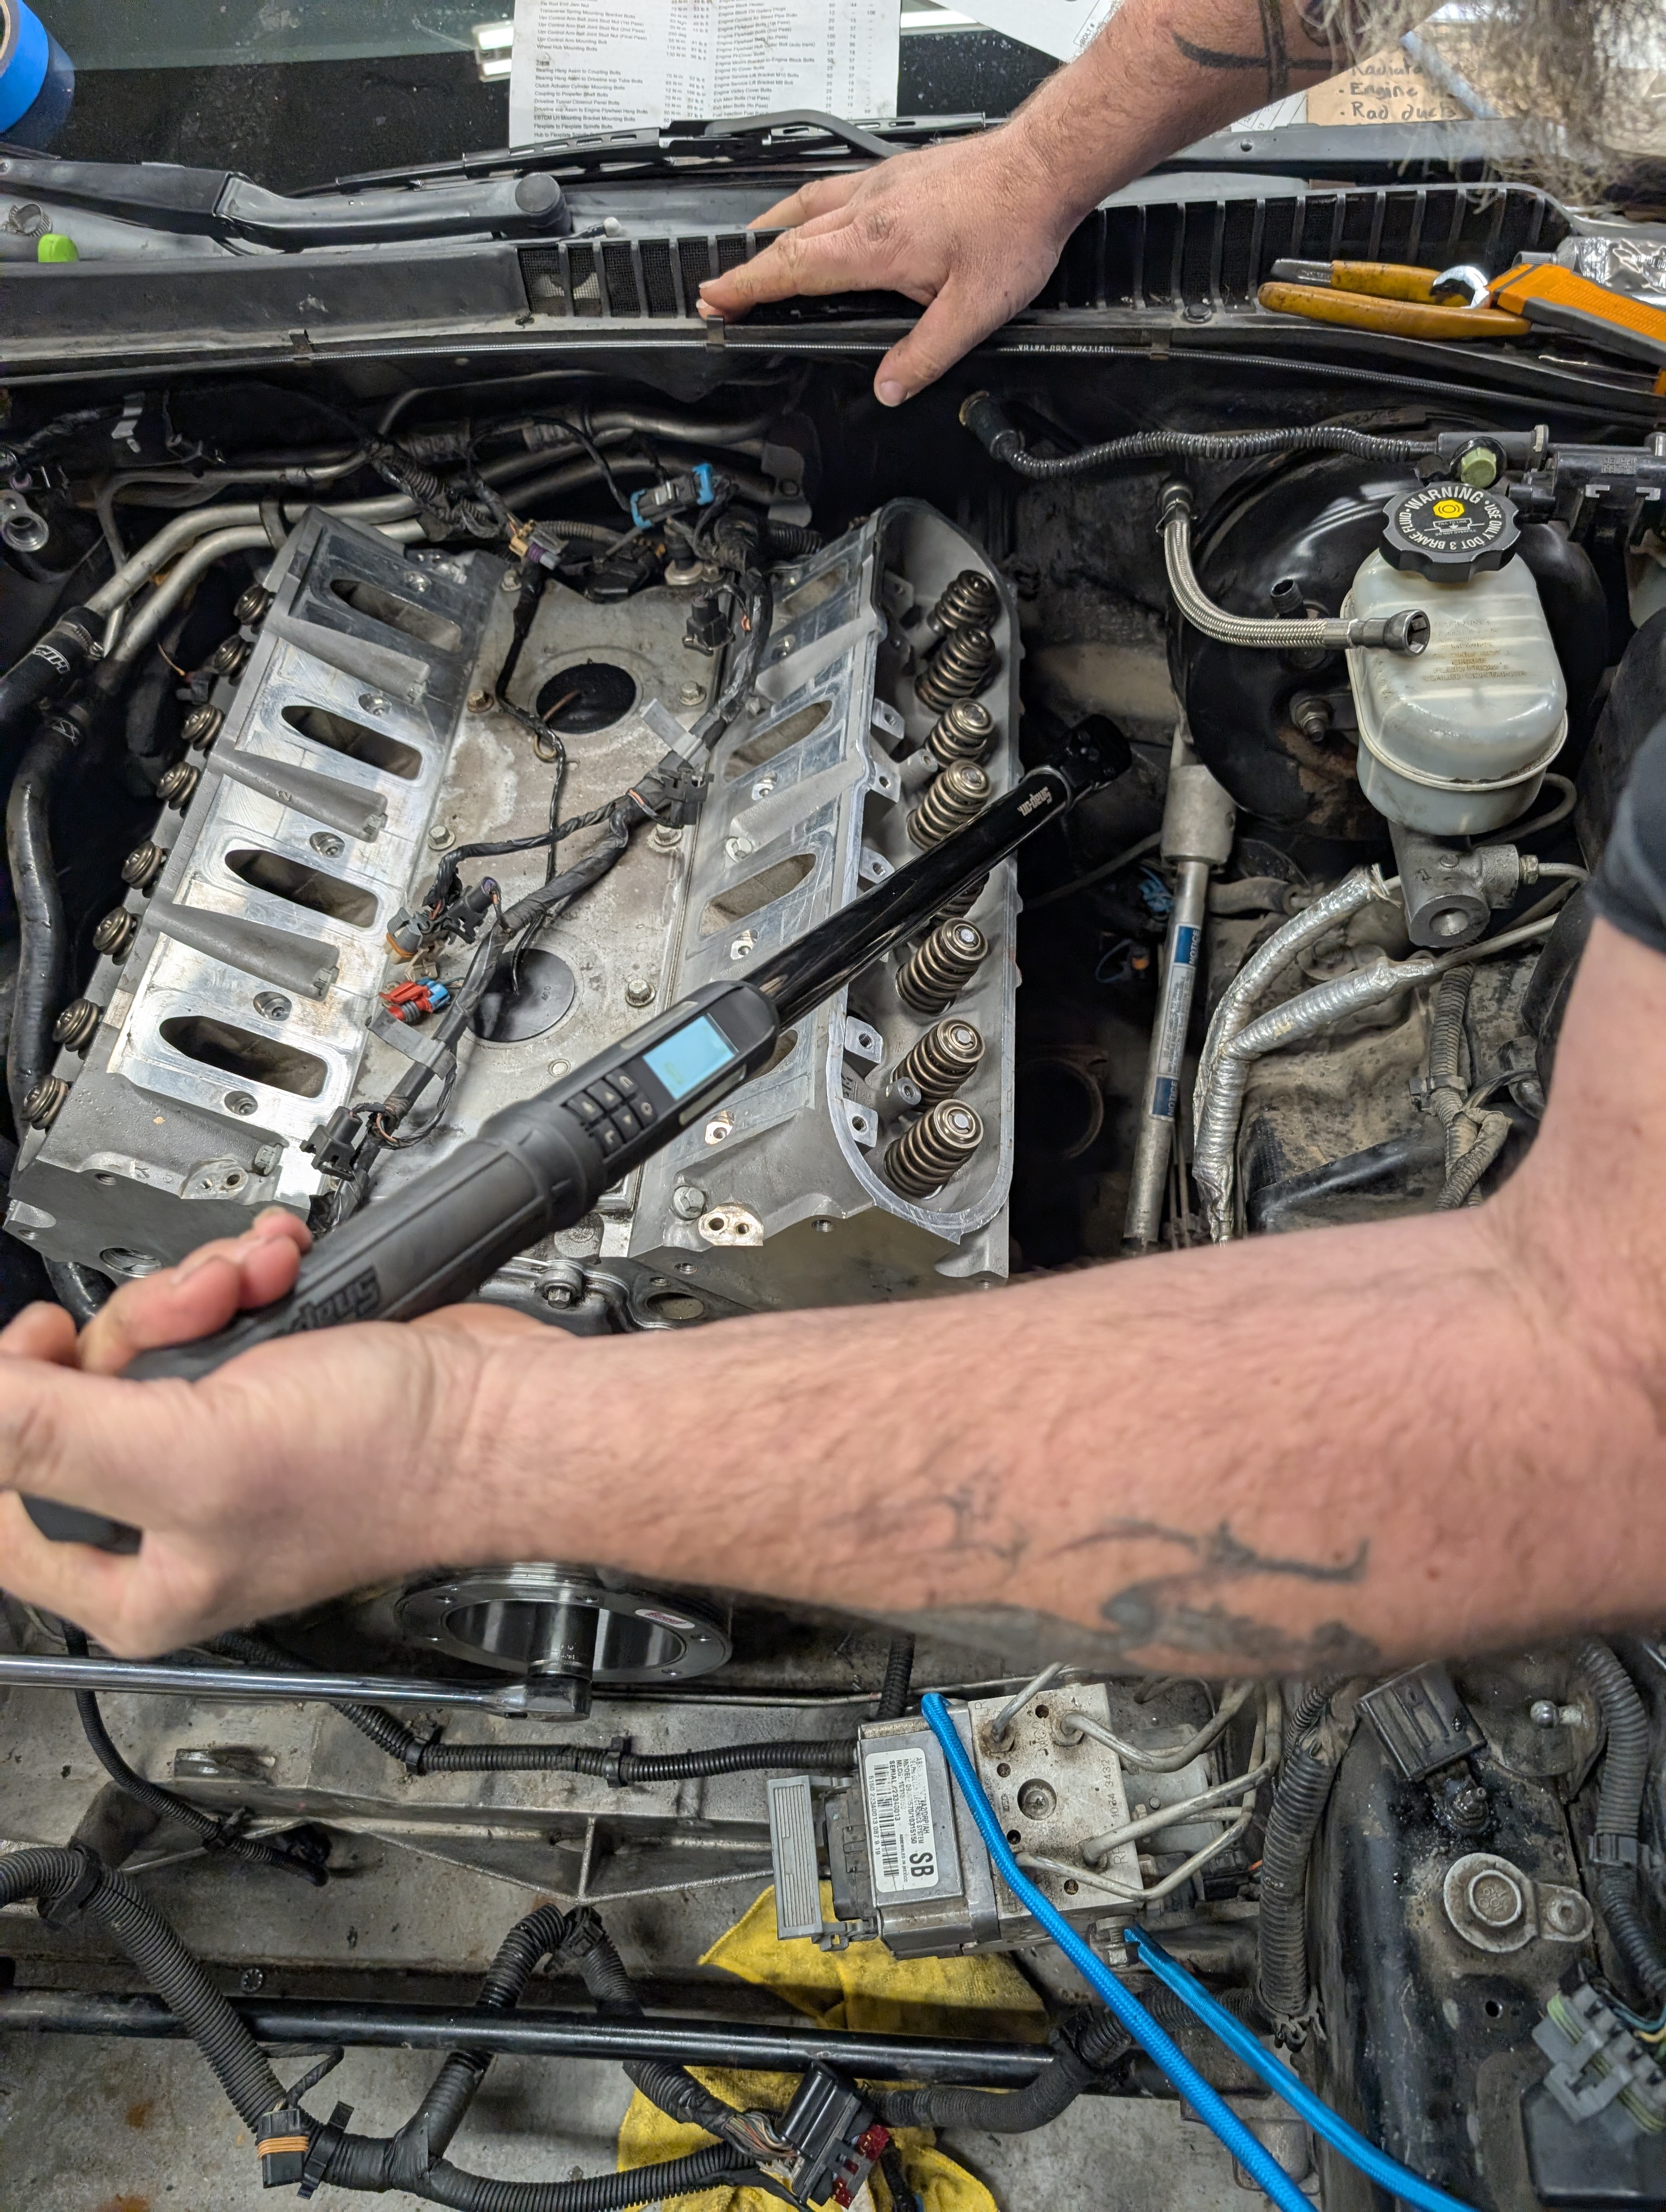
Another piece of advice we'll give is to get a proper digital angle & torque wrench. We've tried faffing around with the various other techniques like adapters that show angle or using paint pens and... that works, but there's nothing as confidence inspiring for your average novice as the sound of that beep when you hit your mark. Make your life easy and get a great tool that treat you right for life.
Worthy "While You're There" Upgrades
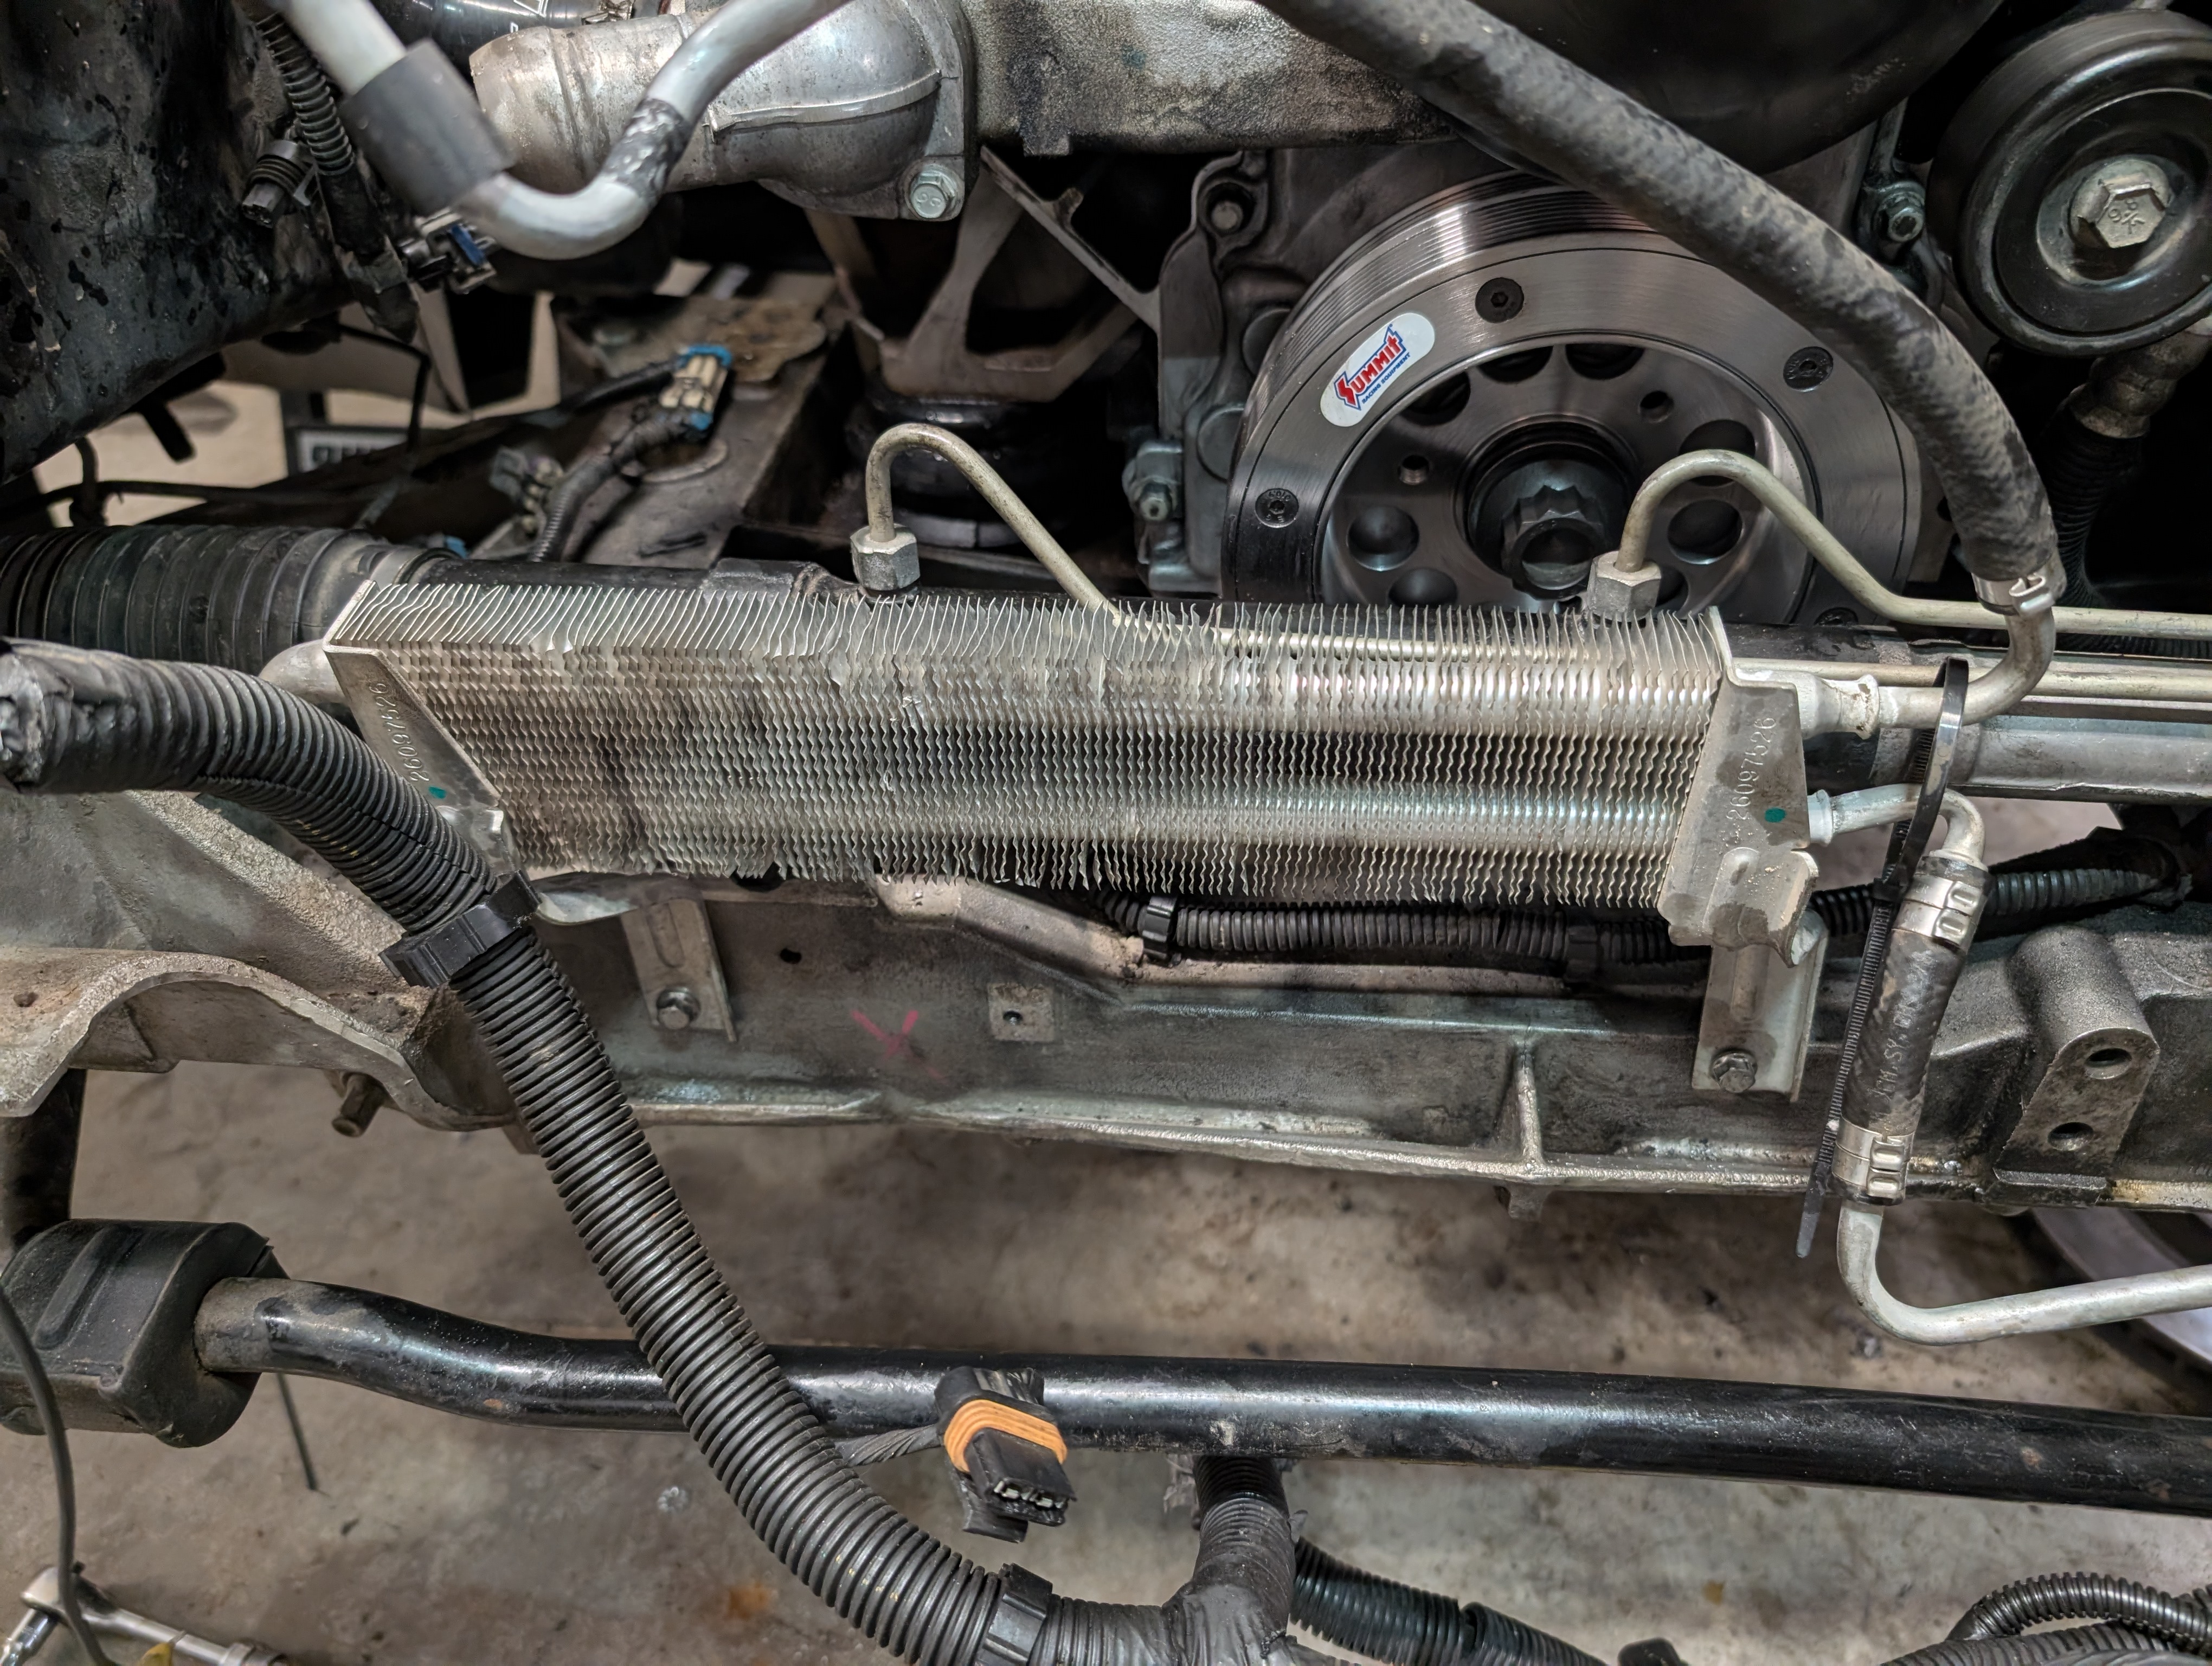
It's worth mentioning that there's a few tasks you're going to want to do to your car while you're here that will make your life better in the long run. The first one being, upgrade to a power steering cooler if you haven't already. You can find the C5 Z06 power steering coolers all day long on ebay for under $100 and they're very easy to put in. Be sure of course when reinstalling them to utilize new o-rings where these attach to the steering rack. Nothing will help keep your steering alive longer than a power steering cooler, and you likely already had to pull the factory loop to remove the power steering cooler for access to other things in the area, so upgrade yours now.
Some Other Items to Strongly Consider In the Vicinity:
- Oil pressure sender. These are known to go bad and are a bit of a pain to access in the future. Now's a perfectly reasonable time to replace yours.
- Knock sensors. They're right there, they rarely go bad... consider knocking it out.
- Steam Port Crossover. This will help your whole system breath and rumor has it, it increases reliability for the rearmost cylinders. Check out our article on how to DIY one
- Intake Manifold Upgrade. If you don't have an LS6 style intake manifold yet, now is the time to grab and install one. You'll already have pulled your intake manifold to get here and a new one is very easy to reinstall.
- 160 Degree thermostat. There's some debate on just how useful these are. We highly recommend them
All Wrapped Up, Time To Fire It Up!
By now more than likely you've found nothing wrong with your motor and can breath a deep sigh of relief like we did to have determined for certain the motor is health. You've also tackled nearly all the reasonable to swap internals, ensuring a long life for the car. While we didn't get into the cam bearings or connecting rod bearings, you'd have had metal in your oil from that and generally other issues like low oil pressure... which is a rare issue on these cars. The car will certainly live on.
Now fair warning, that first start up is going to sound terrible. Lifters without oil pressure sound terrible, and for whatever reason the collective suggested approach for installing lifters is to not leave them soaked in oil anymore so they'll take a bit to fully build up pressure. Ignore the clacks though, keep RPM's modest around 1700 or so RPM... and it'll all smooth out in very short order and leave you with a purring motor!
So Now What if you STILL have a noise?!?

Guess what? Despite having done ALL of this, we still have a noise... and you may too.
First off... don't fret or spiral out of control. You've confirmed for a fact everything in the motor is healthy.
if anything, this just validates that the first phase of this process really did confirm the motor is fine. You've also got fresh internals that are upgraded and will outlive your interest in the car more than likely. The issue at this point more than likely is from the flywheel on backwards, which is all fairly reasonable to access, not that insane to replace, and can be bought in it's entirety for less than the cost of a new engine.
We confidently put back our wrenches, test drove the car, shredded it knowing it's not hurt... and if you're where we are we encourage you to just do the same.
Parts & Tools List We've Used With Success
Note, other parts likely needed and referenced in our first article
- Head gaskets (Multi Layer Steel from Michigan Motorsports)
- Valve Cover Gaskets
- Head Bolts
- Felpro OEM Style (Buy 2x, recommended head bolts)
- ARP Reusable Bolts (we don't think you need them but they are the top dog)
- Exhaust Manifold Gasket
- For cars with AIS style factory headers (blocked or unblocked)
- For cars with long tube headers
- Water Pump Gasket
- LS7 Lifters & Trays (Delphi from Texas Speed)
- Digital Angle & Torque Wrench
- While you're there stuff:
- Oil Pressure Sender
- Thermostat and Housing (NOTE: 195 degree thermostat, If you can find 160 with housing let me know!)
What's Next For the Dead to Shred Corvette
Now that the car drives and we're confident it won't blow up... what remains to do on the Dead To Shred Corvette? Well, we wish our issues were limited to just the weird engine sound. Given the car was crashed, we've got a bunch to redo. We'll be first focusing on getting the chassis buttoned up right to be street-able again. That'll cover everything from undoing all the poorly bodged on fenders and interior and exterior pieces... all the way through to the bad EBCM/ABS situation the C5 Corvettes are known to have, but are reasonable to cure on the 2001+ models. Stay tuned as we get the corvette chassis ready for the upcoming track and autocross season!